Recently Google introduced TensorFlow.js, which is a JavaScript library for training and deploying machine learning models in browsers and on Node.js. I like especially the ability to run predictions in browsers. Since running this code locally saves the remote calls to servers, the performance is amazing!
TensorFlow.js even allows the training of models in browsers via WebGL. While for smaller models the training is fast, it doesn’t work well for larger models. That’s why I describe in this article how to use Watson Machine Learning which is part of Watson Studio to train models in the cloud leveraging multiple GPUs.
As example I use a web application provided by the TensorFlow.js team, called Emoji Scavenger Hunt. The goal of this game is to find real objects with phone cameras that look similar to certain emojis.
Try out the live demo of the original application. In order to see how fast the predictions are run, append ?debug=true to the URL. In my case the experience feels real time.
You can also try my modified version of this application on the IBM Cloud, but it will only work for you if you have items that look similar.
Check out the video for a quick demo.
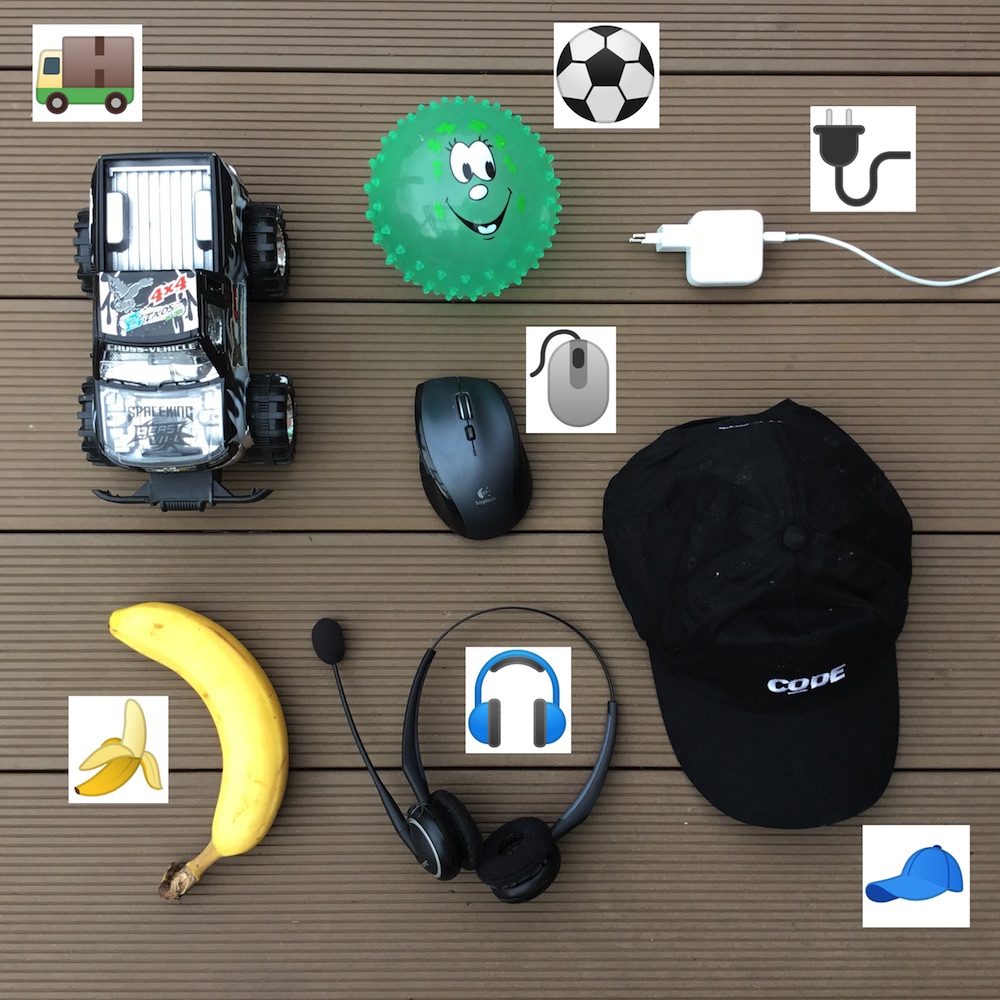
In order to train the model I’ve taken pictures from seven items: plug, soccer ball, mouse, hat, truck, banana and headphones. Here is how the emojis map to the real objects.
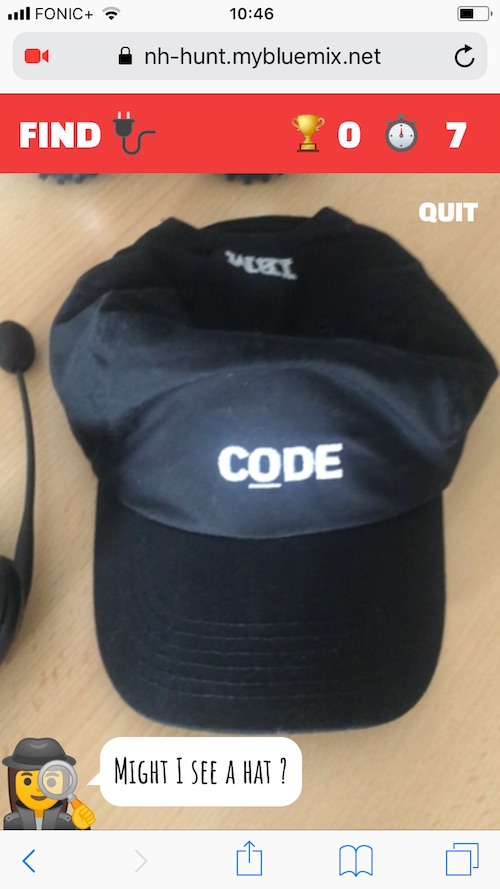
This is a screenshot from the app running on an iPhone where currently a hat is recognized:
Let me now explain how a model with your own pictures can be trained and how the model can be used in web applications. You can get the complete code of this example from GitHub.
Training the Model
In order to train the model I’ve used Watson Deep Learning which is part of IBM Watson Studio. You can get a free IBM Cloud account (no time restriction, no credit card required).
Watson Deep Learning supports several machine learning frameworks. I have used TensorFlow, since TensorFlow.js can import TensorFlow SavedModel (in addition to Keras HDF5 models).
Before running the training, data needs to be uploaded to Cloud Object Storage. This includes the pictures of the objects you want to recognize as well as MobileNet. MobileNet is a pre-trained visual recognition model which is optimized for mobile devices.
In order to run the training, two things need to be provided: A yaml file with the training configuration and a python file with the actual training code.
In the training configuration file train.yaml you need to define compute tiers and the credentials to access Cloud Object Storage. In this sample I’ve used the configuration k80x2 which includes two GPUs.
In the train.yaml file you also need to define which code to trigger when the training is invoked. I’ve reused code from the TensorFlow retrain example. Here is a snippet that shows how to save the model after the training. Read the documentation to understand the prerequisites for deploying and serving TensorFlow models in IBM Watson Studio.
1
2
3
4
5
6
7
8
9
10
11
12
13
14
15
16
17
18
19
20
21
22
23
24
25
26
27
28
29
def export_model(model_info, class_count, saved_model_dir):
  sess, _, _, _, _ = build_eval_session(model_info, class_count)
  graph = sess.graph
  with graph.as_default():
    input_tensor = model_info['resized_input_tensor_name']
    in_image = sess.graph.get_tensor_by_name(input_tensor)
    inputs = {'image': tf.saved_model.utils.build_tensor_info(in_image)}

    out_classes = sess.graph.get_tensor_by_name('final_result:0')
    outputs = {
        'prediction': tf.saved_model.utils.build_tensor_info(out_classes)
    }

    signature = tf.saved_model.signature_def_utils.build_signature_def(
        inputs=inputs,
        outputs=outputs,
        method_name=tf.saved_model.signature_constants.PREDICT_METHOD_NAME)
    legacy_init_op = tf.group(tf.tables_initializer(), name='legacy_init_op')

    builder = tf.saved_model.builder.SavedModelBuilder(saved_model_dir)
    builder.add_meta_graph_and_variables(
        sess, [tf.saved_model.tag_constants.SERVING],
        signature_def_map={
            tf.saved_model.signature_constants.
            DEFAULT_SERVING_SIGNATURE_DEF_KEY:
                signature
        },
        legacy_init_op=legacy_init_op)
    builder.save()
Check out README.md how to trigger the training and how to download the model.
Usage of the Model in a Web Application
Once the training is done, you can download the saved model. Before the model can be used in a web application, it needs to be converted into a web-friendly format converted by the TensorFlow.js converter. Since I’ve had some issues to run the converter on my Mac, I’ve created a little Docker image to do this. Again, check out the README.md for details.
The converted model needs to be copied into the dist directory of the web application. Before running predictions the model is loaded, in this case from the files that are part of the web application. Alternatively the model can also be loaded from remote URLs and stored in the browser.
1
2
3
4
5
6
7
8
9
10
11
const MODEL_FILE_URL = '/model/tensorflowjs_model.pb';
const WEIGHT_MANIFEST_FILE_URL = '/model/weights_manifest.json';

export class MobileNet {
  model: FrozenModel;
  async load() {
    this.model = await loadFrozenModel(
      MODEL_FILE_URL,
      WEIGHT_MANIFEST_FILE_URL
    );
  }
In order to run the predictions, the execute function of the model is invoked:
1
2
3
4
5
6
7
8
9
10
11
12
13
import {loadFrozenModel, FrozenModel} from '@tensorflow/tfjs-converter';
...
model: FrozenModel;
...
const OUTPUT_NODE_NAME = 'final_result';
...
predict(input: tfc.Tensor): tfc.Tensor1D {
    const preprocessedInput = tfc.div(tfc.sub(input.asType('float32'), PREPROCESS_DIVISOR), PREPROCESS_DIVISOR);
    const reshapedInput = preprocessedInput.reshape([1, ...preprocessedInput.shape]);
    const dict: TensorMap = {};
    dict[INPUT_NODE_NAME] = reshapedInput;
    return this.model.execute(dict, OUTPUT_NODE_NAME) as tfc.Tensor1D;
  }
If you want to run this example yourself, get the code from GitHub and get a free IBM Cloud account.


