
Agentic applications, model inference stacks and other Python based code can be deployed on watsonx.ai. For maximal flexibility custom images can be built and deployed to watsonx.ai which is based on OpenShift.
watsonx.ai provides ‘AI Services’ and ‘Python Functions’ to easily deploy Python based assets and to provide endpoints which can be consumed by watsonx services or custom applications. To make this as easy as possible, watsonx.ai comes with predefined software and hardware specifications. The software specifications can be customized, but the Python modules are only installed at runtime. For better efficiency, dependencies can also be packaged and installed directly in images.
Let’s look at an example.
Get Base Image
AI Services and Python Functions are executed in containers. For the different environments images exist which can be pulled and used as starting point for custom Python images.
1
2
3
4
5
6
7
8
9
10
11
12
13
14
15
16
17
18
19
20
21
22
23
24
25
26
27
28
29
30
31
32
33
34
username = 'cpadmin'
api_key = 'xxx'
password = 'xxx'
url = 'https://cpd-cpd-watsonx.apps.xxx.com/'
wml_credentials = {
    "username": username,
    "password": password,
    "url": url,
    "instance_id": 'openshift',
    "version": '5.1'
}

from ibm_watsonx_ai import APIClient
client = APIClient(wml_credentials)
import requests, json
import urllib3
urllib3.disable_warnings(urllib3.exceptions.InsecureRequestWarning)
import json
runtime_definition_name = "runtime-24.1-py3.11"

headers={'Authorization': f'Bearer {client._get_icptoken()}',
         'Content-Type': 'application/json'}
VERSION = '2022-02-01'
response = requests.get(
    f"{url}/v2/runtime_definitions?include=launch_configuration",
    headers=headers,
    verify=False
)

for r in response.json()["resources"]:
    if r["entity"]["name"] != runtime_definition_name:
        continue
    template_runtime_definition = r["entity"]
    print(f"Successfully fetched the Runtime Definition: {runtime_definition_name}")
The snippet returns the name of the image.
1
cp.icr.io/cp/cpd/wml-dep-rt-241-py@sha256:5b0f111b7278d587310ba8f54396763c80f87c8622c5696e107fadxxxxxxxxx
Next you need to login to cp.icr.io with your entitlement key. After this the image can be pulled.
1
2
3
podman login -u cp -p <entitlement-key> cp.icr.io/cp/cpd
BASE_IMAGE="cp.icr.io/cp/cpd/wml-dep-rt-241-py@sha256:5b0f111b7278d587310ba8f54396763c80f87c8622c5696e107fadxxxxxxxxx"
podman pull $BASE_IMAGE
Build Image
The following sample extends the base image by adding a system package and a Python module. You can also add your Python code here.
1
2
3
4
5
6
7
8
9
10
11
12
13
14
15
ARG base_image_tag
FROM ${base_image_tag}

# For installing system packages, use root:root
# e.g.
USER root:root
RUN microdnf install -y jq

# For installing to conda site-packages,
# use wsbuild:wsbuild
# e.g.
USER wsbuild:wsbuild
RUN source activate $WML_CONDA_ENV_NAME && \
   pip install pendulum
USER wsuser:wscommon
Build image and test image locally:
1
2
3
4
5
podman build -t wml-demo-image:test-1 \
    --build-arg base_image_tag=$BASE_IMAGE \
    -f Dockerfile

podman run wml-demo-image:test-1 jq --version
Push Image
The image needs to be made accessible by OpenShift/watsonx.ai. An easy way to do this is to use the internal OpenShift Registry.
1
2
3
4
5
6
7
8
9
10
11
12
13
14
15
16
17
18
oc login ...
oc policy add-role-to-user registry-viewer kubeadmin
oc policy add-role-to-user registry-editor kubeadmin
oc get nodes
oc debug nodes/worker-1

chroot /host
podman login -u kubeadmin -p $(oc whoami -t) image-registry.openshift-image-registry.svc:5000

BASE_IMAGE="cp.icr.io/cp/cpd/wml-dep-rt-241-py@sha256:5b0f111b7278d587310ba8f54396763c80f87c8622c5696e107fadxxxxxxxxx"

echo "ARG base_image_tag ..." > Dockerfile
podman build -t wml-demo-image:test-1 \
    --build-arg base_image_tag=$BASE_IMAGE \
    -f Dockerfile

podman tag wml-demo-image:test-1 image-registry.openshift-image-registry.svc:5000/openshift/wml-demo-image:test-1
podman push image-registry.openshift-image-registry.svc:5000/openshift/wml-demo-image:test-1
Create Runtime Definition
Next a software specification must be defined - see sample notebook. This specification is only documentation as the actual dependencies are defined in the image. Note that ‘built_in’ needs to be set to false.
After this a runtime needs to be defined which points to your image in the OpenShift registry.
1
2
3
4
5
6
7
8
9
10
11
12
13
14
15
16
17
18
19
custom_image_fqn='image-registry.openshift-image-registry.svc:5000/openshift/wml-demo-image:test-1'

template_runtime_definition["name"] = sw_spec_name
template_runtime_definition["display_name"] = sw_spec_name
template_runtime_definition["description"] = f"Runtime definition for custom image {sw_spec_name}"
template_runtime_definition["runtime_type"] = "wml"
template_runtime_definition["launch_configuration"]["software_specification_name"] = sw_spec_name
template_runtime_definition["launch_configuration"]["image"] = custom_image_fqn
custom_image_runtime_definition = template_runtime_definition

response = requests.post(
    CPDHOST + f'/v2/runtime_definitions',
    headers=headers,
    json=custom_image_runtime_definition,
    verify=False)
if response.status_code == 201:
    print(f"Successfully created the Runtime Definition for custom image with software specification {sw_spec_name}")
else:
    print(response.status_code, response.json())
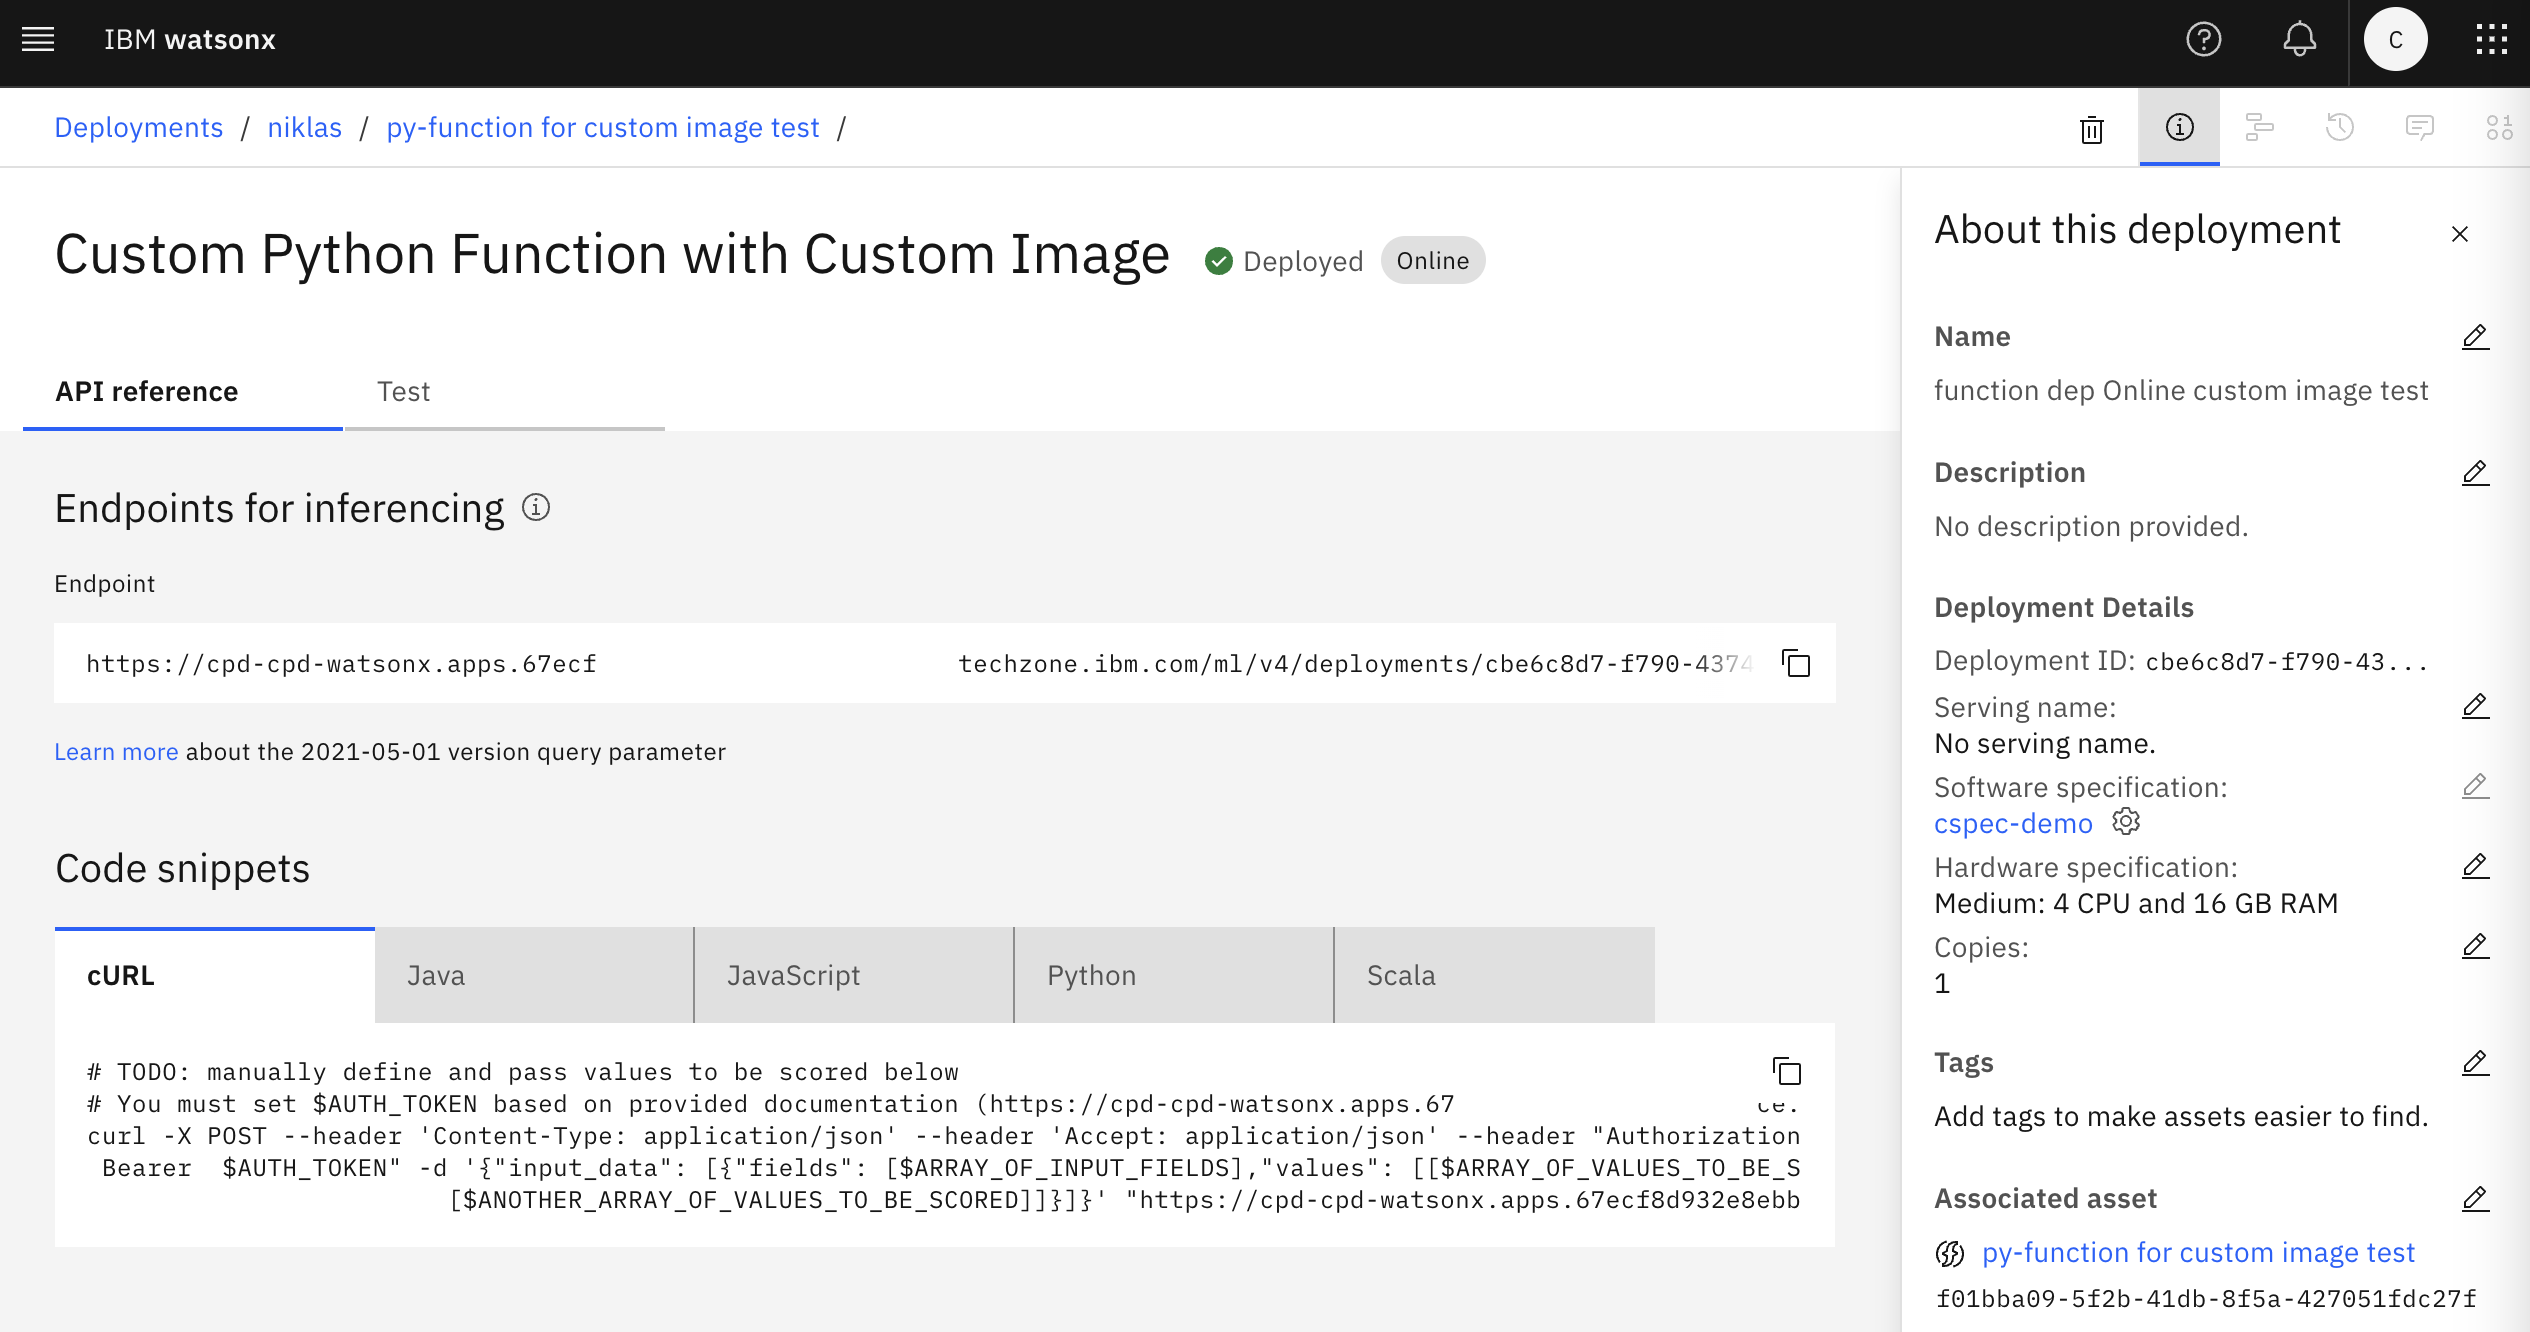
Deploy Python Function
To use the custom image a Python Function or an AI Service needs to be defined. In the simplest case they are just thin wrappers pointing to the Python code on the image. This type of wrapper is necessary, so that watsonx.ai understands how to invoke the custom containers.
1
2
3
4
5
6
7
8
9
10
11
12
13
14
15
16
17
18
19
20
21
22
23
24
25
26
27
28
29
30
31
32
33
space_id = '38326323-455f-44a3-8c23-5df481467e61'
client.set.default_space(space_id)

def score_generator():
    def callModel(payload_scoring):
        import pendulum
        v4_scoring_response = {
            'predictions': [{'values': [pendulum.__version__]}]
        }
        return v4_scoring_response
    def score(input):
        prediction = callModel(input);
        return prediction
    return score

stored_function_details = client.repository.store_function(
    function=score_generator,
    meta_props={
    client.repository.FunctionMetaNames.NAME: "Custom Python Function with Custom Image",
    client.repository.FunctionMetaNames.DESCRIPTION: "Test Custom Image",
    client.repository.FunctionMetaNames.SOFTWARE_SPEC_UID:
        client.software_specifications.get_id_by_name(sw_spec_name)
    }
)
function_id=client.repository.get_function_id(stored_function_details)

meta_props = {
    client.deployments.ConfigurationMetaNames.NAME: "Custom Python Function with Custom Image",
    client.deployments.ConfigurationMetaNames.ONLINE: {},
    client.deployments.ConfigurationMetaNames.HARDWARE_SPEC : {
        "id":  client.hardware_specifications.get_id_by_name('S')}
}
deployment_details = client.deployments.create(function_id, meta_props)
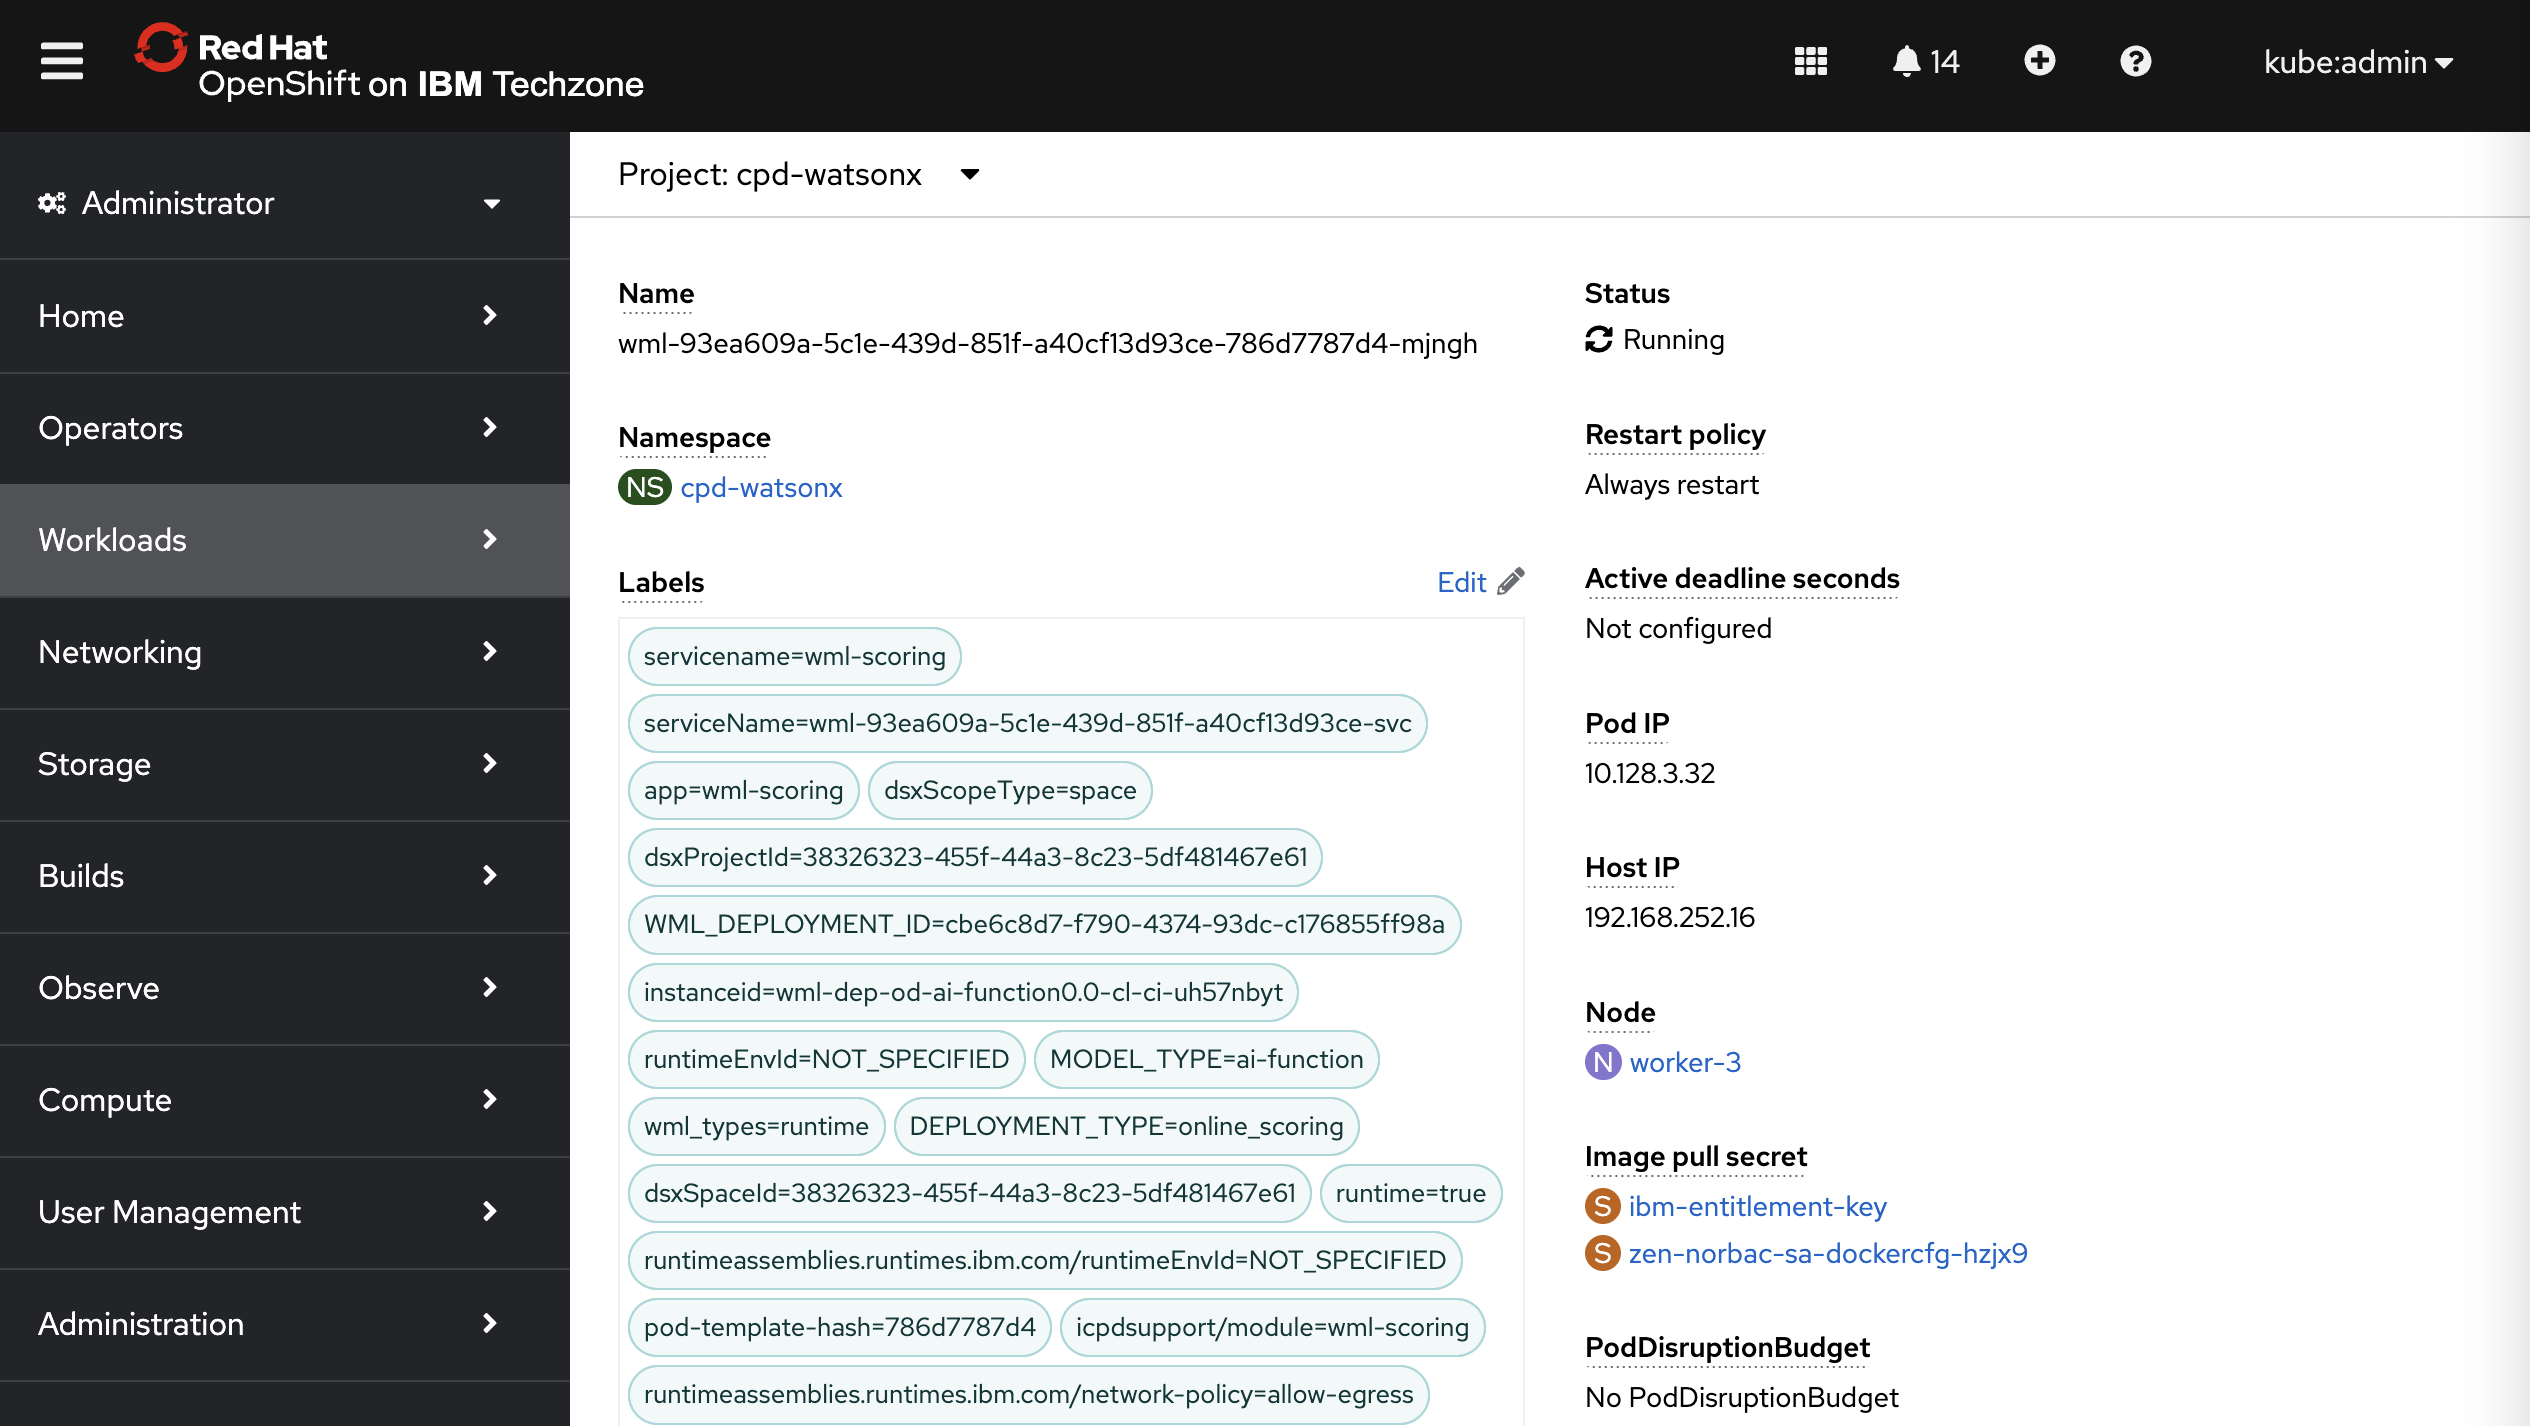
Once deployed, the container shows up as part of a pod.

Labels are automatically assigned.
Deployment Options
As mentioned, there are various ways to deploy custom Python code on watsonx.ai. With the latest watsonx.ai version, you can choose between AI Services and Python Functions. AI Services have two advantages:
- AI Services support streaming
- AI Services have more flexible interfaces
Running Python Functions on GPUs is currently not supported. If you want to try it, make sure you use the software specification with the cuda drivers ‘runtime-24.1-py3.11-cuda’. AI Services don’t work on GPUs with the predefined hardware specifications.
The post Resource Specifications for Custom Code in watsonx.ai describes how advanced users can change resources like memory, CPU and GPU.
Next Steps
Here are some resources:
- Custom Image Example
- Resource Specifications for Custom Code in watsonx.ai
- Predefined software specifications
- Predefined hardware specifications
- Customizing runtimes with external libraries and packages
- Accessing the OpenShift Registry
To learn more, check out the Watsonx.ai documentation and the Watsonx.ai landing page.