
TensorFlow Object Detection is a powerful technology to recognize different objects in images including their positions. The trained Object Detection models can be run on mobile and edge devices to execute predictions really fast. I’ve used this technology to build a demo where Anki Overdrive cars and obstacles are detected via an iOS app. When obstacles are detected, the cars are stopped automatically.
Check out the short video (only 2 mins) for a quick demo.
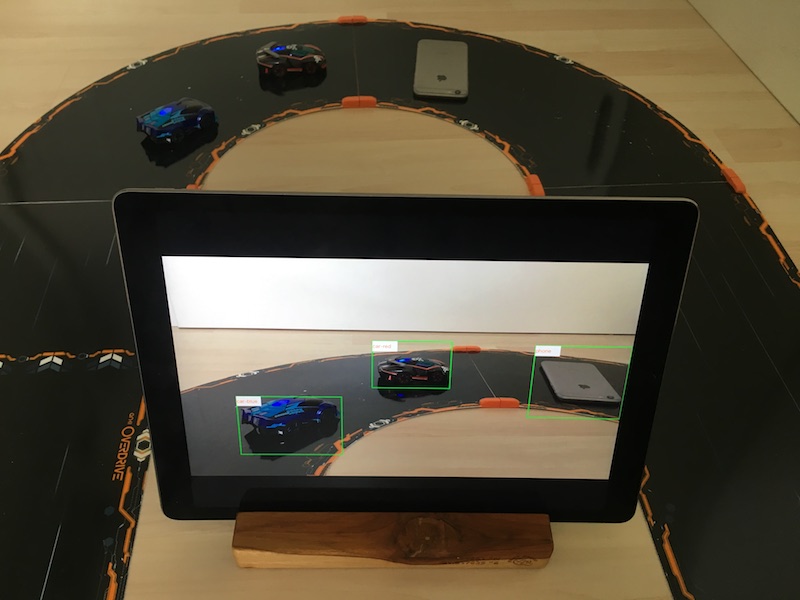
This picture shows the track with two cars and a phone and the iOS app which draws rectangles around the objects.
I have open sourced the code on GitHub. The repo includes two parts:
- Trained deep learning model to recognize items on Anki Overdrive tracks with an iOS app
- Documentation how to train TensorFlow Object Detection models
The instructions in the README are pretty detailed. Below is a quick overview of the main steps that you can follow to train models to detect your own objects.
1) Development Environment Setup
First you need to download the trained MobileNet model which is an optimized model for mobile devices. Rather than training a new model from scratch, transfer learning is used. Basically the last layer of the neural network is replaced with your own objects.
To make the setup of the development environment as simple as possible, Docker containers are provided.
2) Labelling of Images
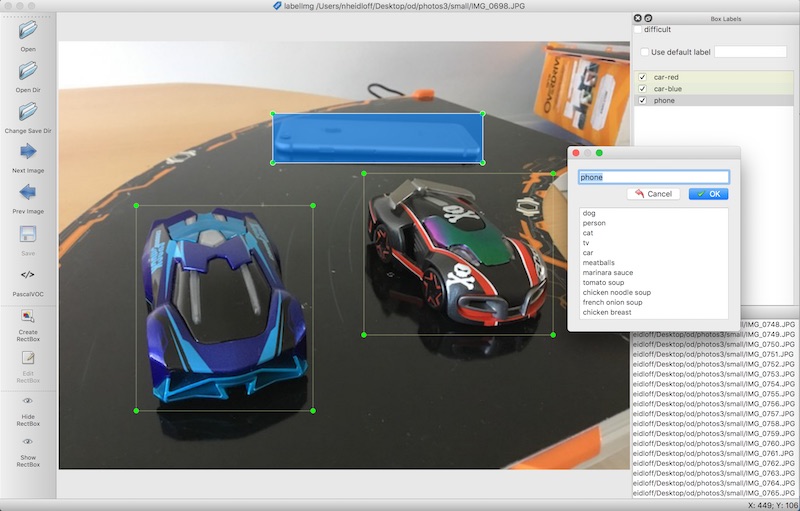
While for Visual Recognition models only images and the names of the categories need to be provided, the labeling for Object Detection is more sophisticated. In addition to the list of objects you also need to provide their positions. I’ve used labelImg to create the labels and rectangles as shown in the screenshot.
From what I’ve read these are some best practices how to create the training data:
- Take/get at least 50 pictures per object.
- Use a rather small resolution, for example 640 x 480.
- Use different sizes of your objects and different angles.
- Use pictures that have multiple objects in them.
- When marking the objects with labelImg, put the rectangles as closely as possible around the objects.
The images and the annotations exported from the labelImg tool need to be converted into a certain format (TFRecords) which TensorFlow Object Detection expects.
3) Training of the Model
Trainings with just a few training steps can be run locally. This is useful, for example, if you want to test whether the code runs. When you can use a GPU, trainings with many steps should also be possible locally, but I haven’t tried it.
I’ve used Kubernetes on the IBM Cloud to run the training. The 17.000 training steps took roughly 1.5 days. In order to also leverage GPUs I want to look at FfDL. I’ll blog about it when I’ll have found out more. If you want to use the IBM Cloud, you can get a free account.

After the training a frozen graph of the model needs to be created. The repo contains a script and a Docker container to do this.
4) Usage of the Model in Notebooks and Apps
The training model can be tested with a Python notebook. The screenshot shows the detected objects in a test image.

The repo also contains an iOS app which I found on GitHub.
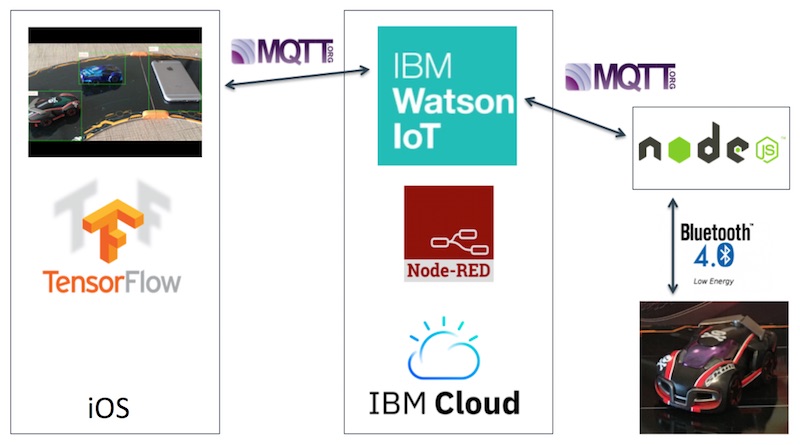
Connecting the Cars and the iOS App to the Watson IoT Platform
In order to stop the Anki Overdrive cars when phones are put on the track, you need to set up additional components, especially the Node.js controller and the Watson IoT Platform. In order to do this, follow the instructions from my project node-mqtt-for-anki-overdrive.
Here is a diagram of the high level architecture:
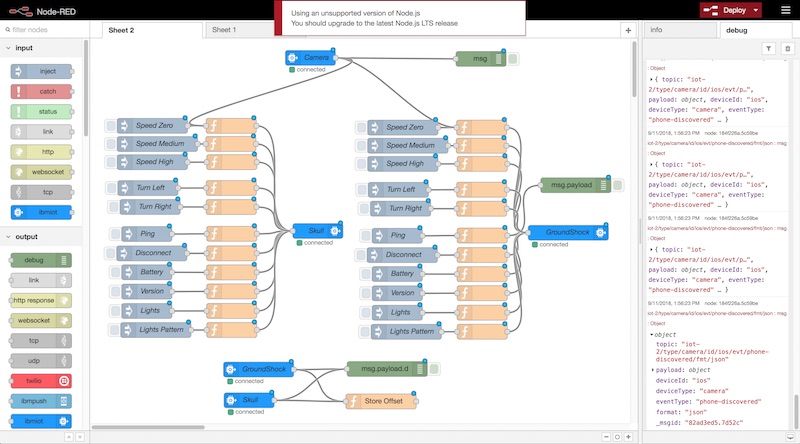
The next screenshot shows a simple Node-RED flow that stops the cars when obstacles are detected.
If you want to run this demo yourself, you need an Anki Overdrive Starter Kit and the code from GitHub.