
As software agents become increasingly autonomous, the role of human oversight remains essential. This post introduces a new technique called the Ralph Wiggum Loop, which can autonomously generate code. However, developers remain responsible for clearly defining the application’s architecture and required features as well as the acceptance of the generated code.
I previously outlined how to execute the Ralph loop to autonomously produce source code. That loop focuses exclusively on code generation. Before reaching that stage, however, developers must clearly articulate what they want to build. This post walks through a complete example of the full process including the preparatory steps. AI supports all stages, though the early phases require stronger human leadership, while certain implementation tasks can later be automated.
Note: The flow below is intentionally simplified to highlight the core concepts. Adapt the steps to fit your own workflows or organizational needs.
Ralph Wiggum Loop
The Ralph Wiggum Loop was introduced in July of last year and has gained significant traction since. Several resources (listed at the end of this article) explain the reasoning behind the pattern and the choice of the Simpsons character Ralph Wiggum as its namesake. To get started, I recommend watching the introductory video.
Although the loop can run autonomously, for example, overnight, it requires two critical inputs:
- A detailed specification and implementation plan
- Clear exit criteria that indicate when the work is complete
With these components, the loop executes multiple focused iterations, each dedicated to a small subset of tasks. This mirrors agile development practices where teams select the highest‑priority backlog items for each sprint. A key characteristic of the Ralph Loop is its fresh context per iteration: each run starts with the same base prompt plus a summary of progress so far. This avoids context‑window overflow and reduces the risk of losing important information through repeated summarization.
Example
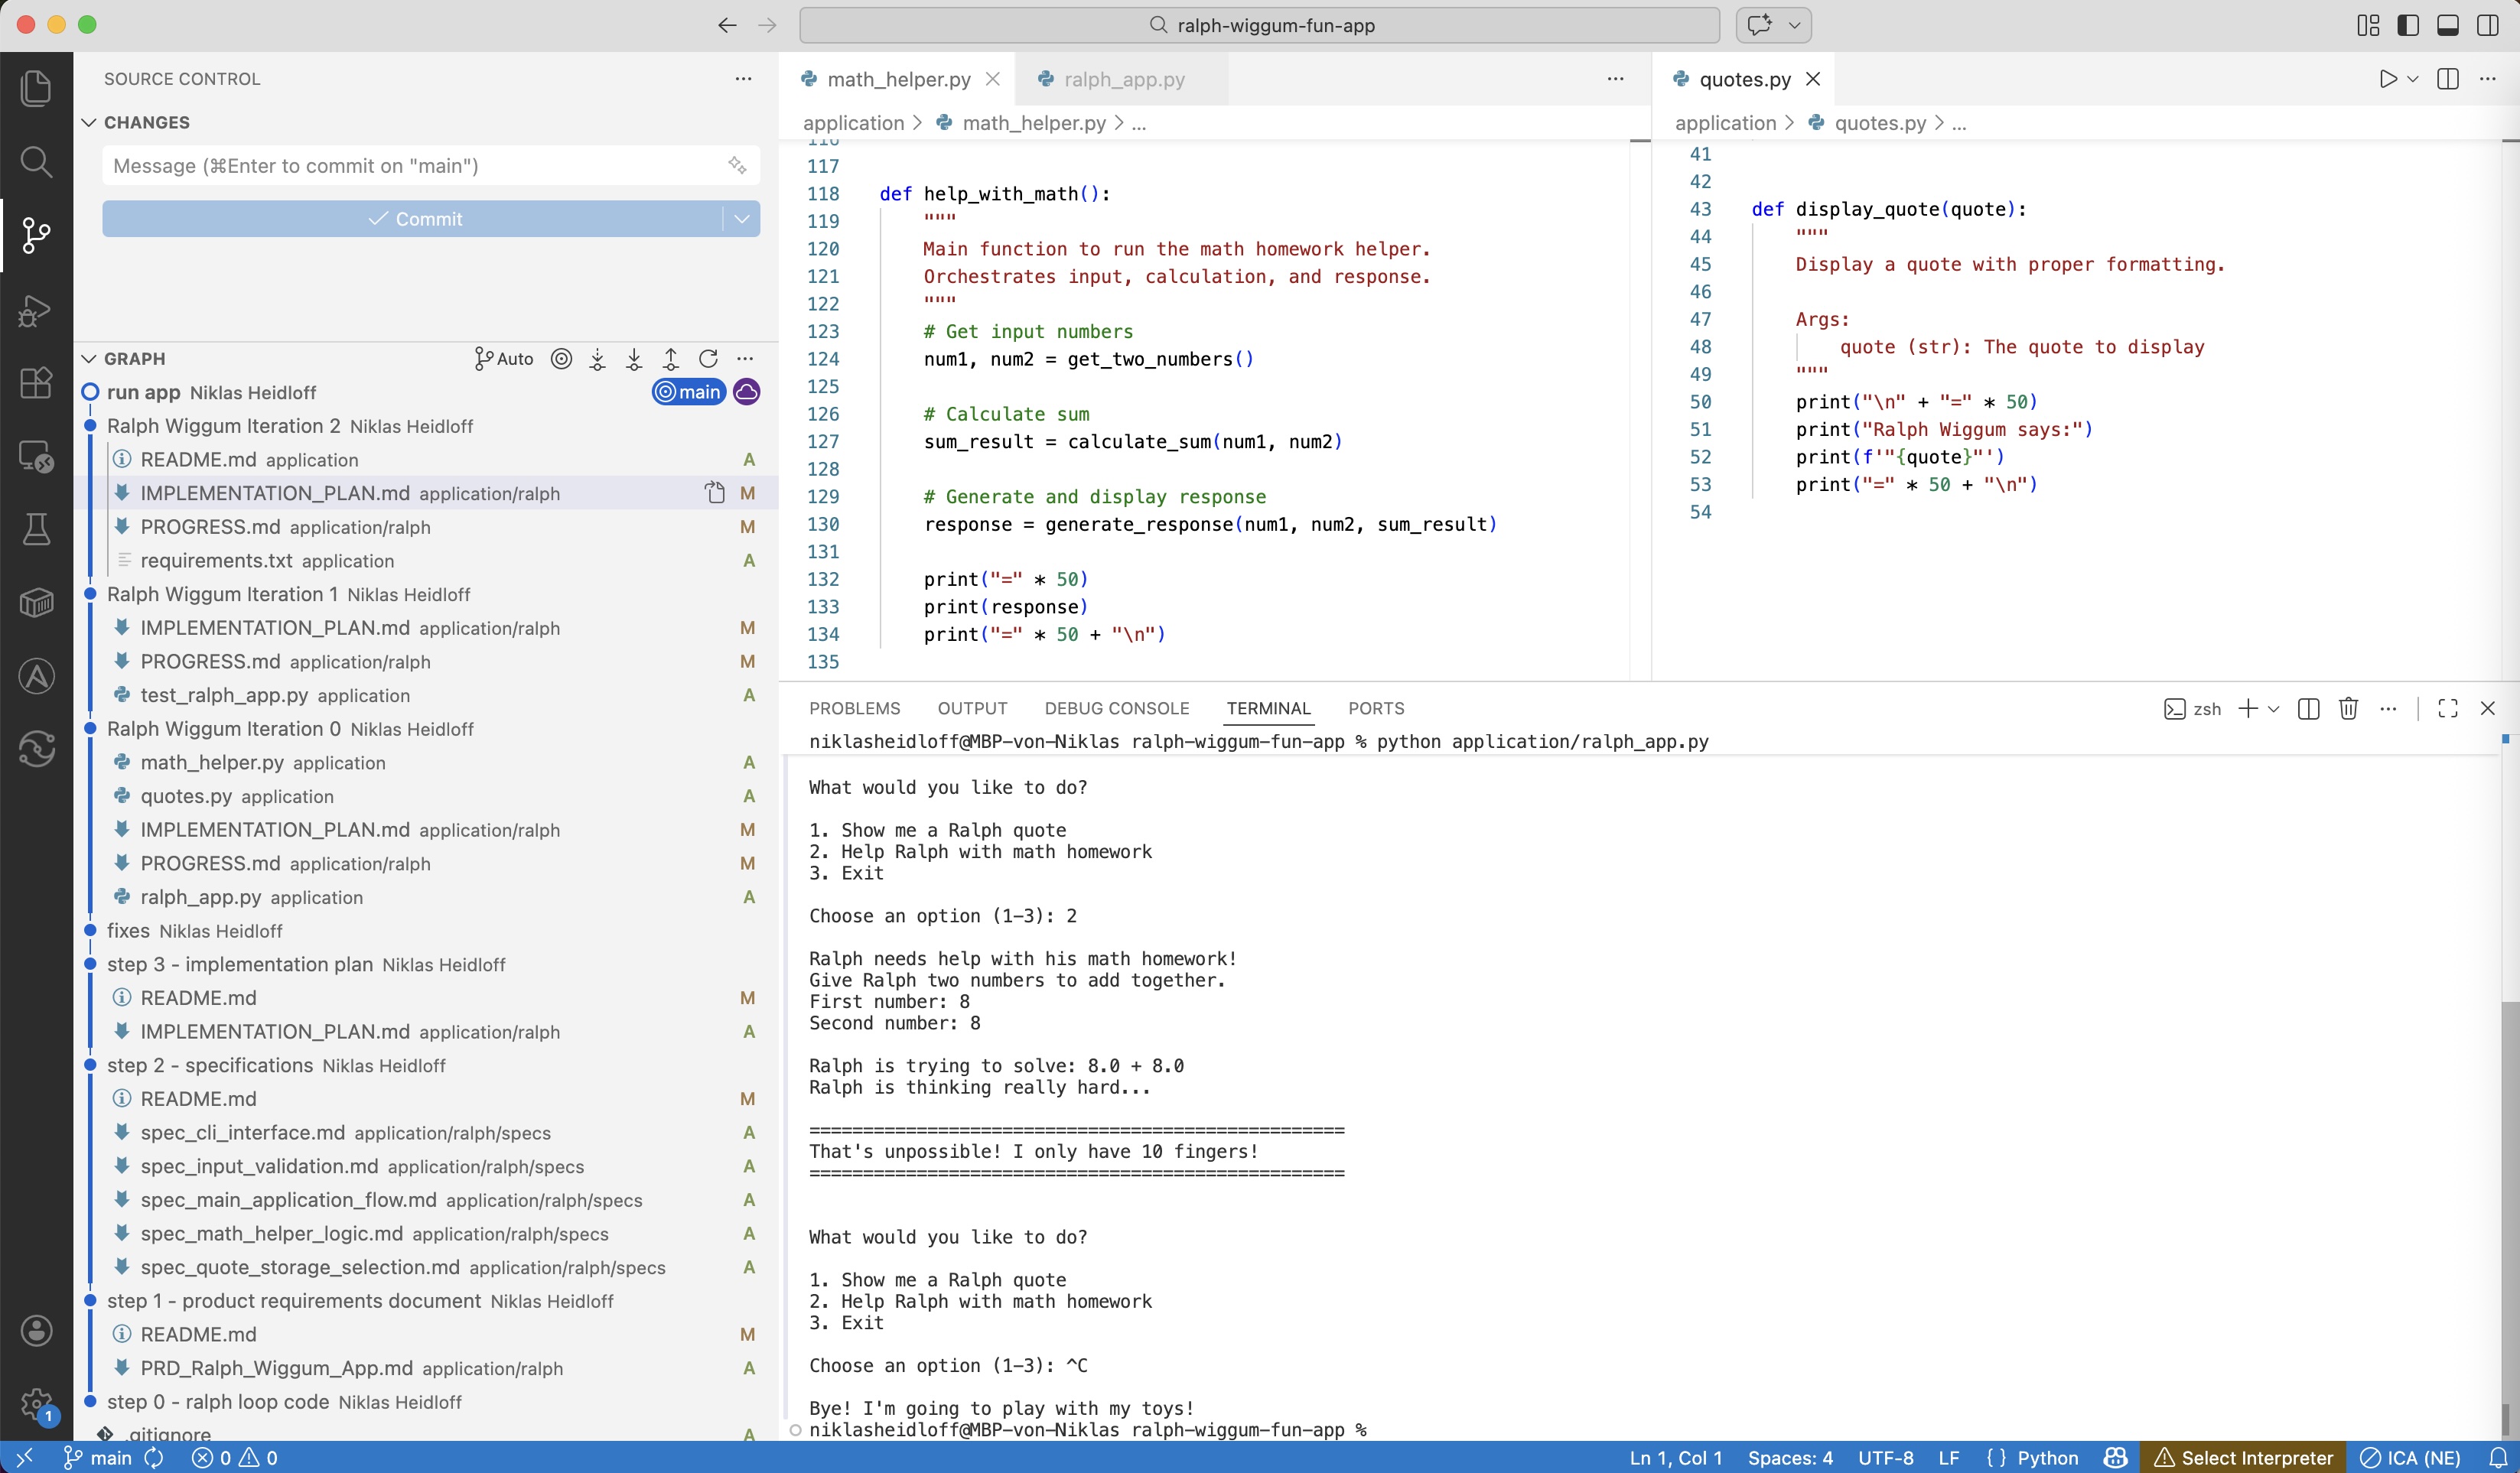
A complete sample implementation is available on GitHub. Reviewing the Git history reveals the different stages of the loop in action. The example is a simple Python application that generates Ralph Wiggum quotes and performs calculations as Ralph would.
Product Requirements Document
The first step is creating a Product Requirements Document (PRD). AI can assist, but humans must specify the high‑level intent: what type of application is being built and why.
In IBM Bob, the ‘Plan’ mode supports a conversation between the user and the agent.
1
2
3
4
5
6
7
Create a high-quality Product Requirements Document (PRD) to build software.
If there is information missing, let's discuss and ask me questions until
you have all necessary information.

[more details what should be covered by the PRD and what not]

Build an application with two funny samples about Ralph Wiggum from the Simpsons.
Bob asked several clarifying questions and provided options, such as:
- A simple command-line tool or script
- Python (easy to run, good for CLI tools)
- Display random Ralph Wiggum quotes when run
After reviewing the generated PRD, I requested an additional feature:
1
2
Add another example to help Ralph with his homework. Ralph is not very good at math,
but he tries his best. If the sum is greater than 10, it is too hard for Ralph.
Take a look at the generated PRD.
Specifications
Next, the PRD is translated into feature specifications. This step uses only the PRD, not the full conversation.
Unlike PRD creation, this stage is typically less interactive.
The following prompt is a sample how to break down the PRD in specifications for features.
1
2
3
4
5
6
7
8
9
10
11
12
13
14
15
Create specifications for the features in @application/ralph/PRD_Ralph_Wiggum_App.md.
Break down the tasks in separate .md files for different features.
If you have questions about features, ask me.
Use the following structure.

# Spec: $FEATURE_NAME

## Overview
$OVERVIEW

## Requirements
1. **Script Name**: $FILES
2. **Behavior**: $BEHAVIOUR
3. **Data**: $DATA
4. **Execution**: $EXECUTION
Take a look at the generated specifications.
Implementation Plan
Next an implementation plan is generated based on the specifications.
1
2
3
4
5
6
7
8
9
10
11
12
13
14
15
16
17
18
19
20
21
22
23
24
Create an IMPLEMENTATION_PLAN.md file that describes how and in which order to
implement the application which is specified in multiple files in the @specs directory.
The IMPLEMENTATION_PLAN should have the following structure:

# Implementation Plan

## Feature: $FEATURE_NAME1
- [ ] $INSTRUCTION1
- [ ] $INSTRUCTION2
- [ ] $INSTRUCTION3

## Feature: $FEATURE_NAME2
- [ ] $INSTRUCTION4

Break down the tasks in simple steps. Prioritize task in this order.
Fail fast on risky work. Save easy wins for later:
1. Architectural decisions and core abstractions
2. Integration points between modules
3. Unknown unknowns and spike work
4. Standard features and implementation
5. Polish, cleanup, and quick wins

Do not refer to the Product Requirement Document.
The implementation plan needs to be self-contained.
The ‘[ ]’ notation is important for my sample. The Ralph loop will mark tasks as completed ‘[x]’ later to help Ralph to understand when he’s done.
Take a look at the generated implementation plan.
Ralph Loop
With the PRD, specifications, and implementation plan prepared, the Ralph Loop can begin.
To test whether the prompt in the loop works, you should run the first iterations manually and check the progress after each iteration via ‘iteration.sh’.
To run the loop autonomously run ‘loop.sh’. You can define a maximum number of iterations. The loop exists when all tasks in the implementation plan have been marked as completed.
Here is the prompt:
1
2
3
4
5
6
7
8
9
10
11
12
13
14
15
16
17
18
19
20
21
22
23
24
25
26
27
28
29
30
31
32
33
34
35
36
37
38
39
You are an expert software engineer named Ralph. Your goal is to implement the
functionality described in the specs/ folder by following the
IMPLEMENTATION_PLAN.md.

## Instructions
1. **Orient**:
   - Read the files in @ralph/specs/ to understand what needs to be built.
   - If necessary, read the code in the current directory
   - If necessary, check the git log for previous work
2. **Plan**:
   - Read @ralph/IMPLEMENTATION_PLAN.md to see what tasks are remaining.
   - Read @ralph/PROGRESS.md to see what has been done previously.
3. **Select**:
   - Pick the highest priority "Todo" item from the plan.
   - Only pick one of the features.
   - When choosing the next task, prioritize in this order.
     Fail fast on risky work. Save easy wins for later:
     1. Architectural decisions and core abstractions
     2. Integration points between modules
     3. Unknown unknowns and spike work
     4. Standard features and implementation
     5. Polish, cleanup, and quick wins
4. **Act**:
   - Write the code to implement that single task.
   - Run tests to verify your code works.
   - **Crucially**: Update @ralph/IMPLEMENTATION_PLAN.md to mark the
     task as "Done".
   - Append your progress to @ralph/PROGRESS.md. Keep entries concise.
     Sacrifice grammar for the sake of concision. This file helps future iterations skip exploration:
     - Tasks completed in this session
     - Decisions made and why
     - Blockers encountered
     - Files changed
5. **Stop**: Do not try to do everything at once.
   Do one thing well, then exit.

## Constraints
- If a file doesn't exist, create it.
- If tests fail, fix the code before marking the task done.
The following two lines are very important since they help the AI to decide when an iteration is completed.
1
2
Run tests to verify your code works.
If tests fail, fix the code before marking the task done.
The instructions in the README describe how to run the Ralph loop with IBM Bob, an AI-based Software Development Lifecycle partner. For security reasons Bob is run in a container since it’s necessary to give him access to many tools or everything via ‘bob –yolo’ (You Only Live Once).
Check out the generated code and the Git history. You can see how the implementation plan changes after iterations and what information is stored in PROGRESS.md.
Next Steps
To find out more, check out the following resources: