
Agents unlock their full potential when they can run tools on behalf of users, turning complex workflows into simple, automated actions. By offloading repetitive or low‑critical tasks to autonomous agents, users become more productive while the agents invoke the right tools at the right time.
This post describes how tools can be developed that run on behalf of users via OAuth in watsonx Orchestrate. watsonx Orchestrate is IBM’s platform to build and run agentic applications in enterprises. Credentials can be stored and managed in a secure vault.
Watsonx Orchestrate comes with pre-built agents and tools to access enterprise systems. Various authentication and authorization mechanisms are supported via Connections.
You can also integrate other systems via the same mechanism. I’ve created a simple example that demonstrates the complete OAuth flow and a sample conversation. The code is on GitHub. Everything runs locally, so that no access to other third-party systems is necessary.
Example Scenario
Here is a sample conversation:
- User: Book a flight from Boston to Berlin
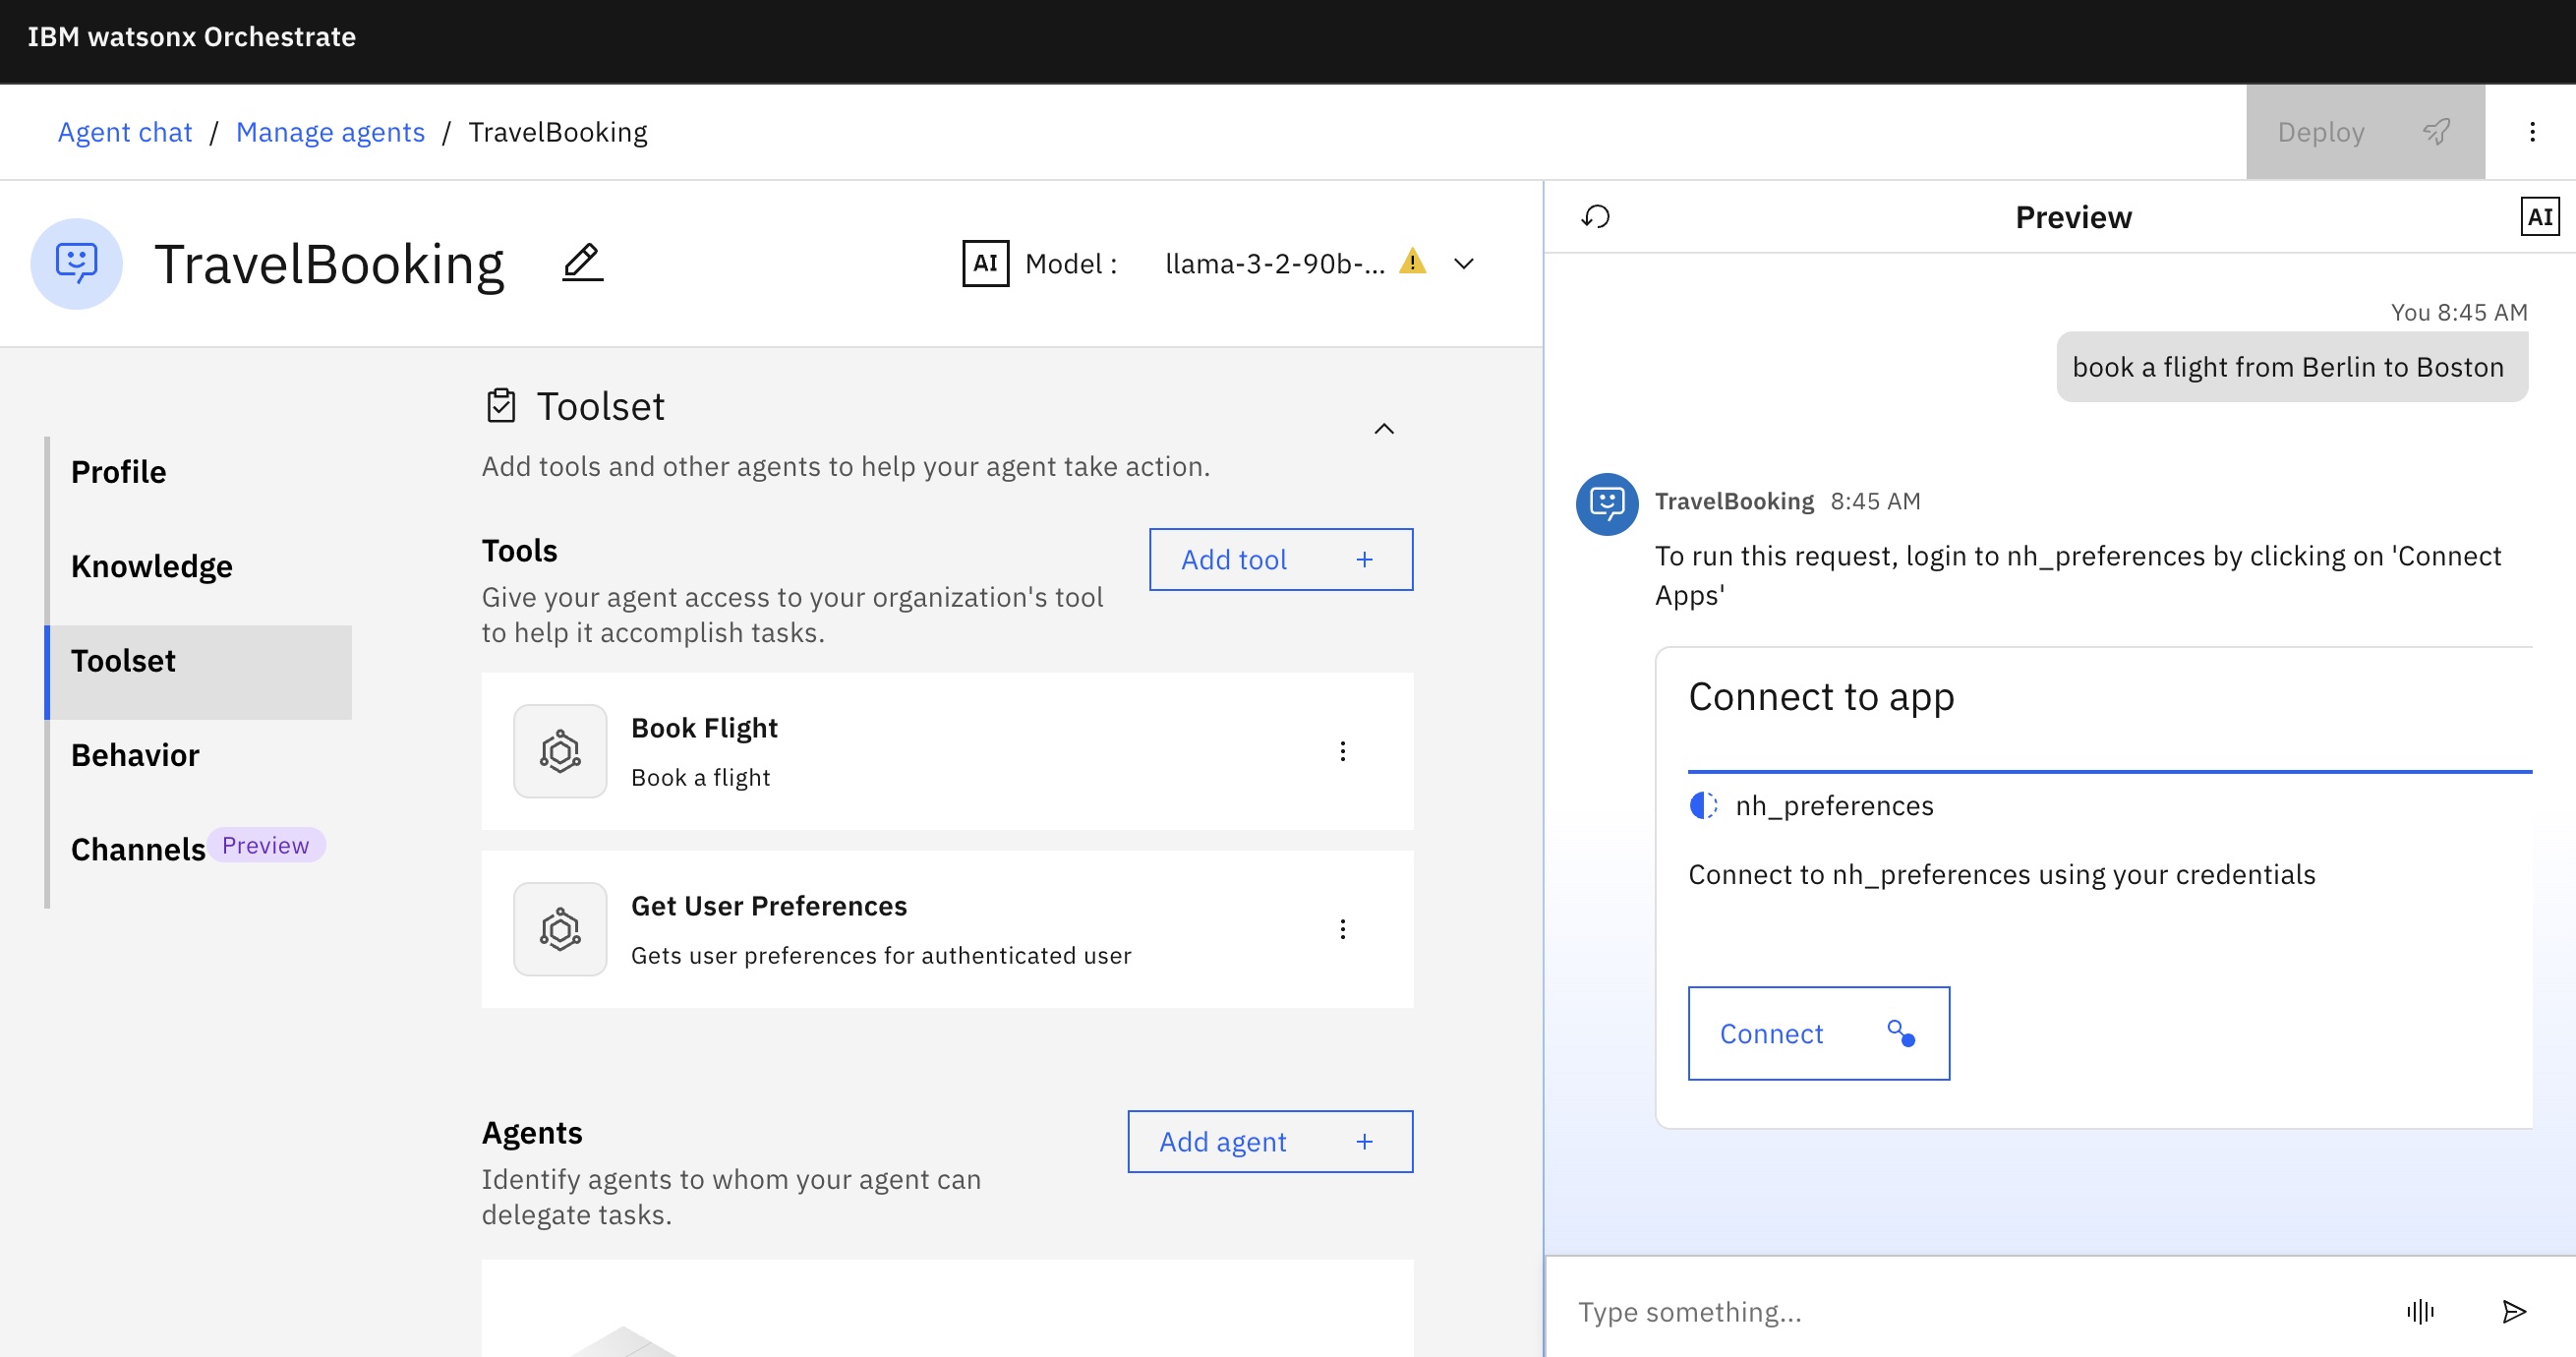
- Agent: You need to log in with your personal credentials and grant access to the ‘preferences’ tool (this only needs to be done once)
- User logs in and grants access
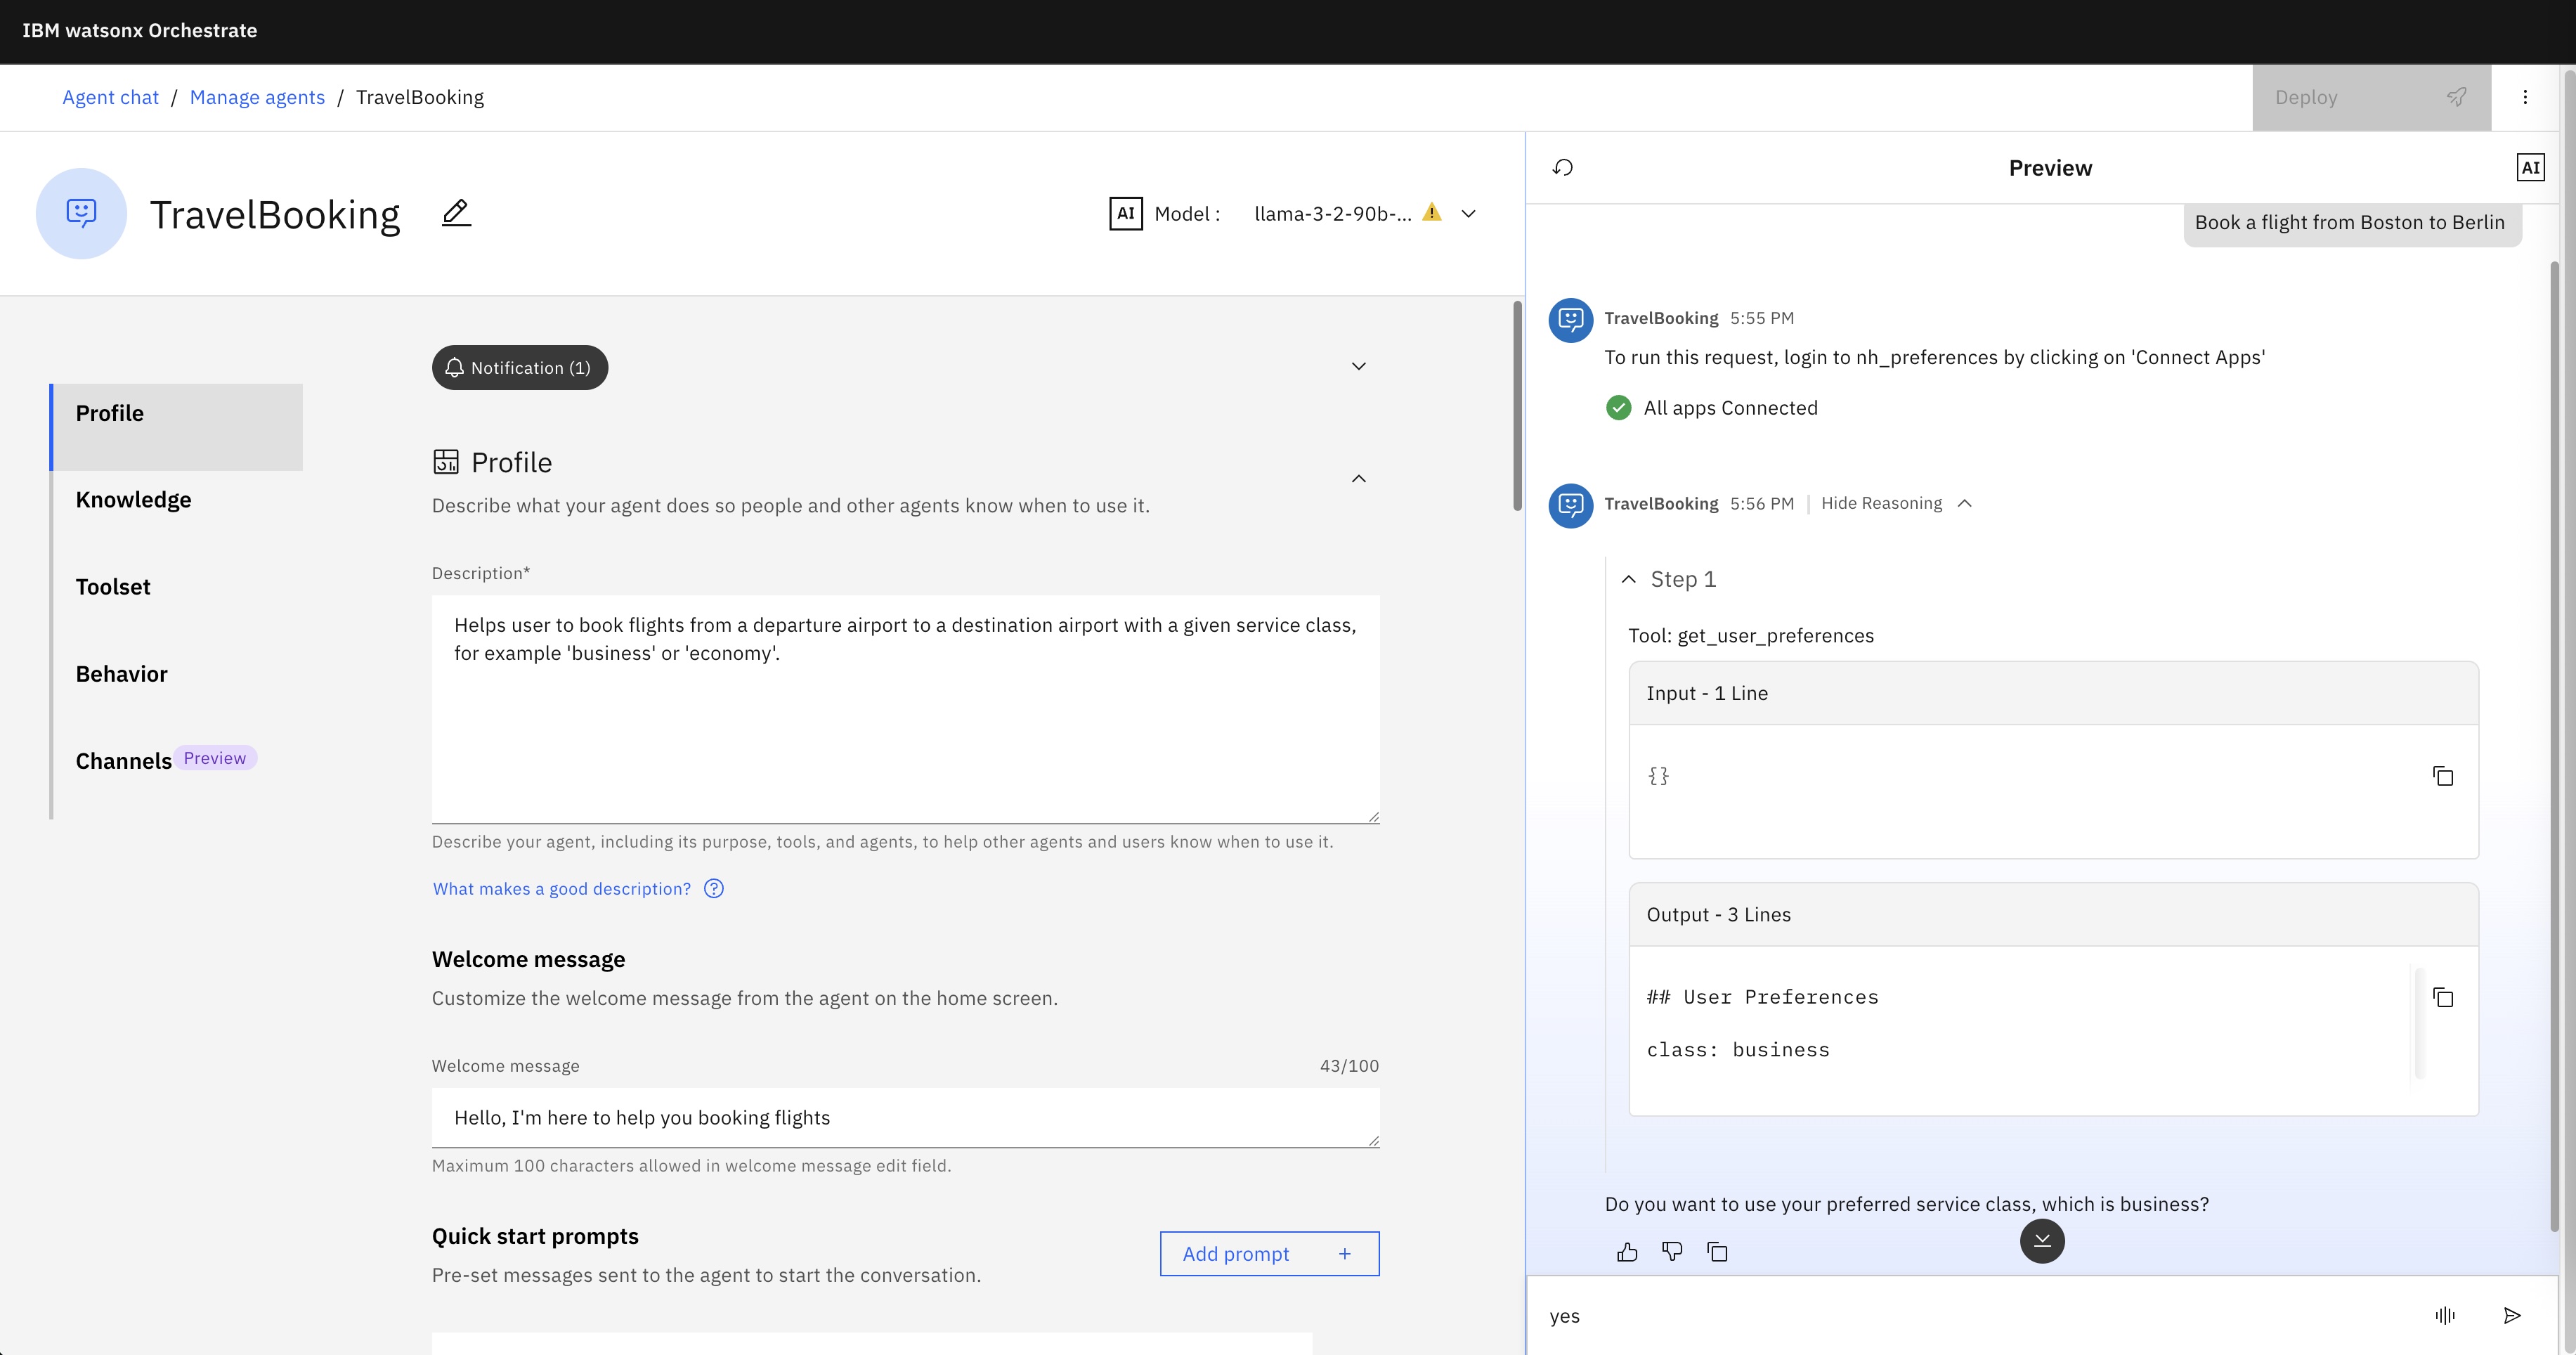
- Agent invokes preferences tool and reads the service class preference of the current user
- Agent: Do you want to use your preferred service class, which is business?
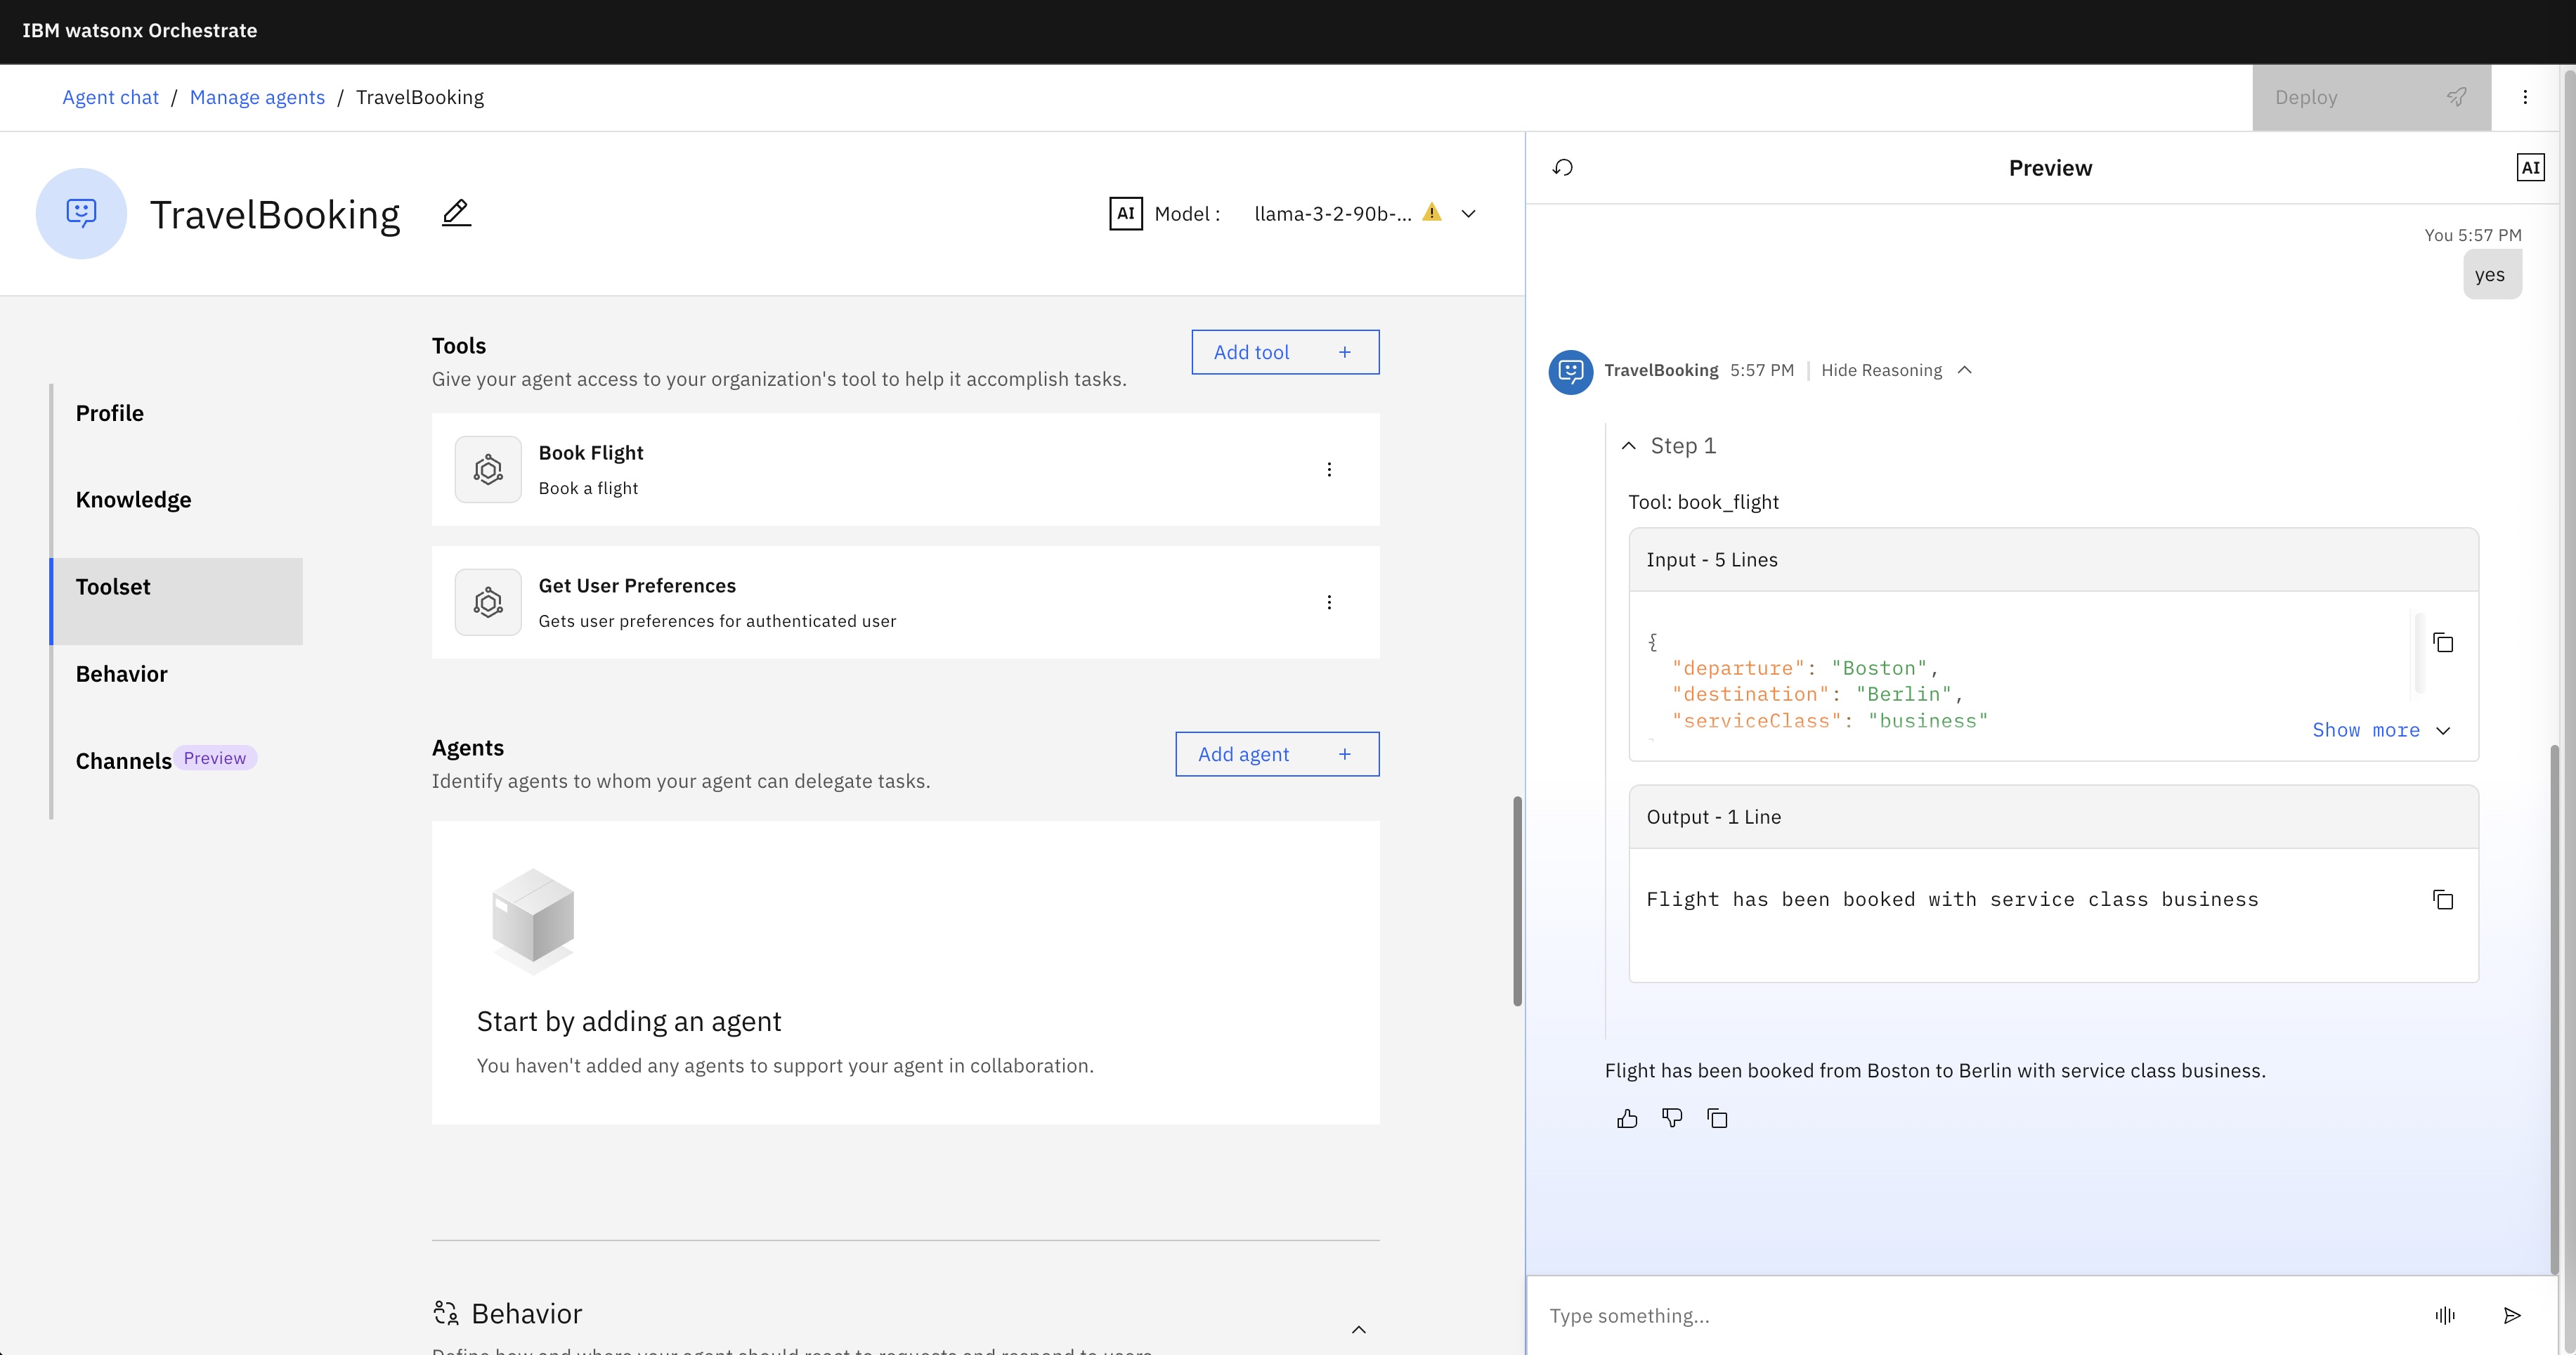
- User: Yes
- Agent invokes the flight booking tool and passes in the service class
- Agent: Flight has been booked from Boston to Berlin with service class business.
The following screenshots show the different steps:
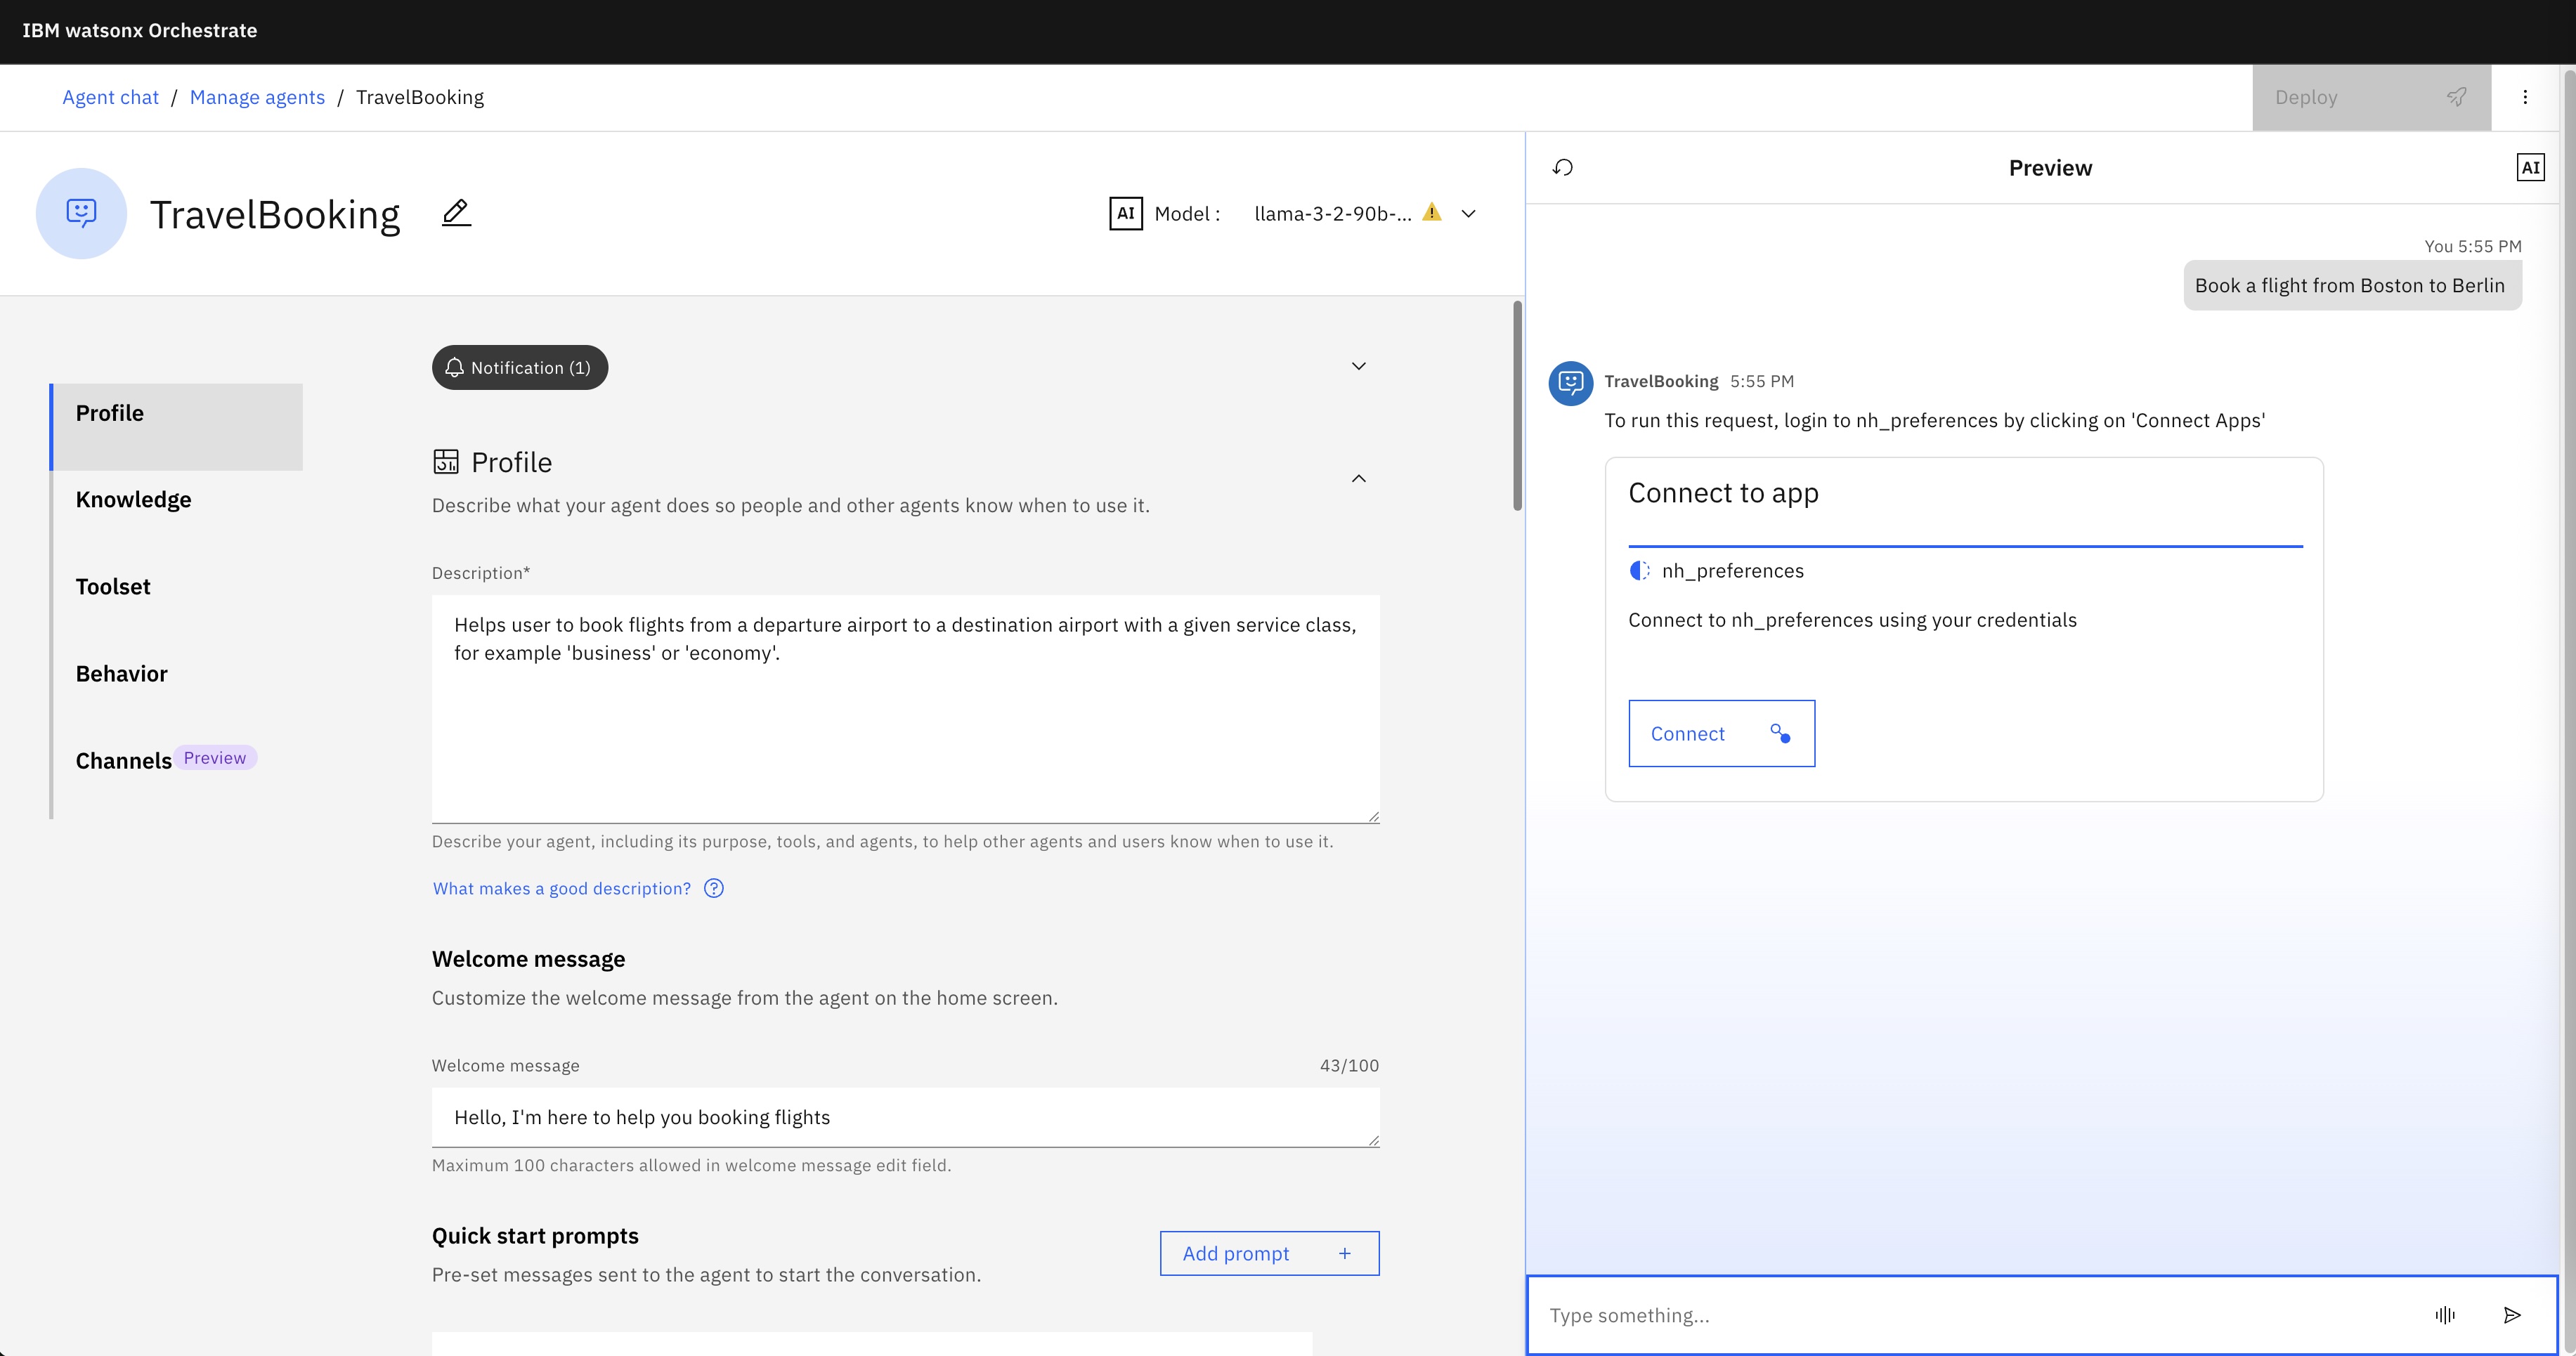
Users must log on:

Users grant access to the external system:

The agent invokes the preferences tool:
The agent invokes the flight booking tool:
Example Setup
You can run the sample yourself locally except of the language model. Below I use the watsonx Orchestrate Developer Edition running as containers plus two applications running locally.
The repo contains the complete code. If you want to understand the OAuth flow, read the architecture documentation.
OAuth server
1
2
3
git clone https://github.com/nheidloff/watsonx-orchestrate-oauth-tools.git
cd server
npm run dev
Preferences service
The preferences tool invokes the preferences service via REST APIs. Python tools can be imported in watsonx Orchestrate but are restricted. For example, they cannot utilize databases.
For watsonx Orchestrate to access the OAuth server and the preferences service which are running locally from the container environment, you need to find out your IP address. The commands below worked for me, but I recommend you ask tools like IBM Bob for your local IP.
1
2
3
4
5
I need to access local applications from Docker. Which IP should I use?
The following two commands might be helpful:

networksetup -listallhardwareports | grep -A2 "Wi-Fi\|Ethernet"
ipconfig getifaddr en9
Put the IP address in preferences_tool.py and in the commands below.
1
2
cd service
npm run dev
watsonx Orchestrate
Note that you can launch Orchestrate with ‘–with-connections-ui’ so that you can see and change connections in the user interface.
1
2
3
4
5
orchestrate server start --env-file=./.env -l --with-connections-ui
orchestrate env activate local
orchestrate chat start
open http://localhost:3000/
open http://localhost:3412/connectors
OAuth Registration
The example comes preconfigured with a client ID, secret ID and redirect URL, but you can also register your own OAuth application.

The OAuth configuration and the definition of the agent and the two tools needs to be imported.
1
2
3
4
5
6
7
8
9
10
11
12
13
14
15
16
17
18
19
20
21
22
23
24
25
26
27
28
29
30
orchestrate connections add -a nh_preferences

orchestrate connections configure \
  --app-id nh_preferences \
  --env draft \
  --kind oauth_auth_code_flow \
  --type member \
  --server-url http://192.168.178.199:3005

orchestrate connections set-credentials \
  --app-id nh_preferences \
  --env draft \
  --client-id client_xxx \
  --client-secret secret_xxx \
  --token-url http://192.168.178.199:3005/oauth/token \
  --auth-url http://192.168.178.199:3005/oauth/authorize

cd orchestrate
orchestrate tools import \
  --kind python \
  --file preferences_tool.py \
  --app-id nh_preferences \
  --requirements-file requirements.txt
orchestrate tools import \
  --kind python \
  --file book_flight.py \
  --requirements-file requirements.txt
orchestrate agents import \
  --file travel_booking_agent.yaml \
  --app-id nh_preferences
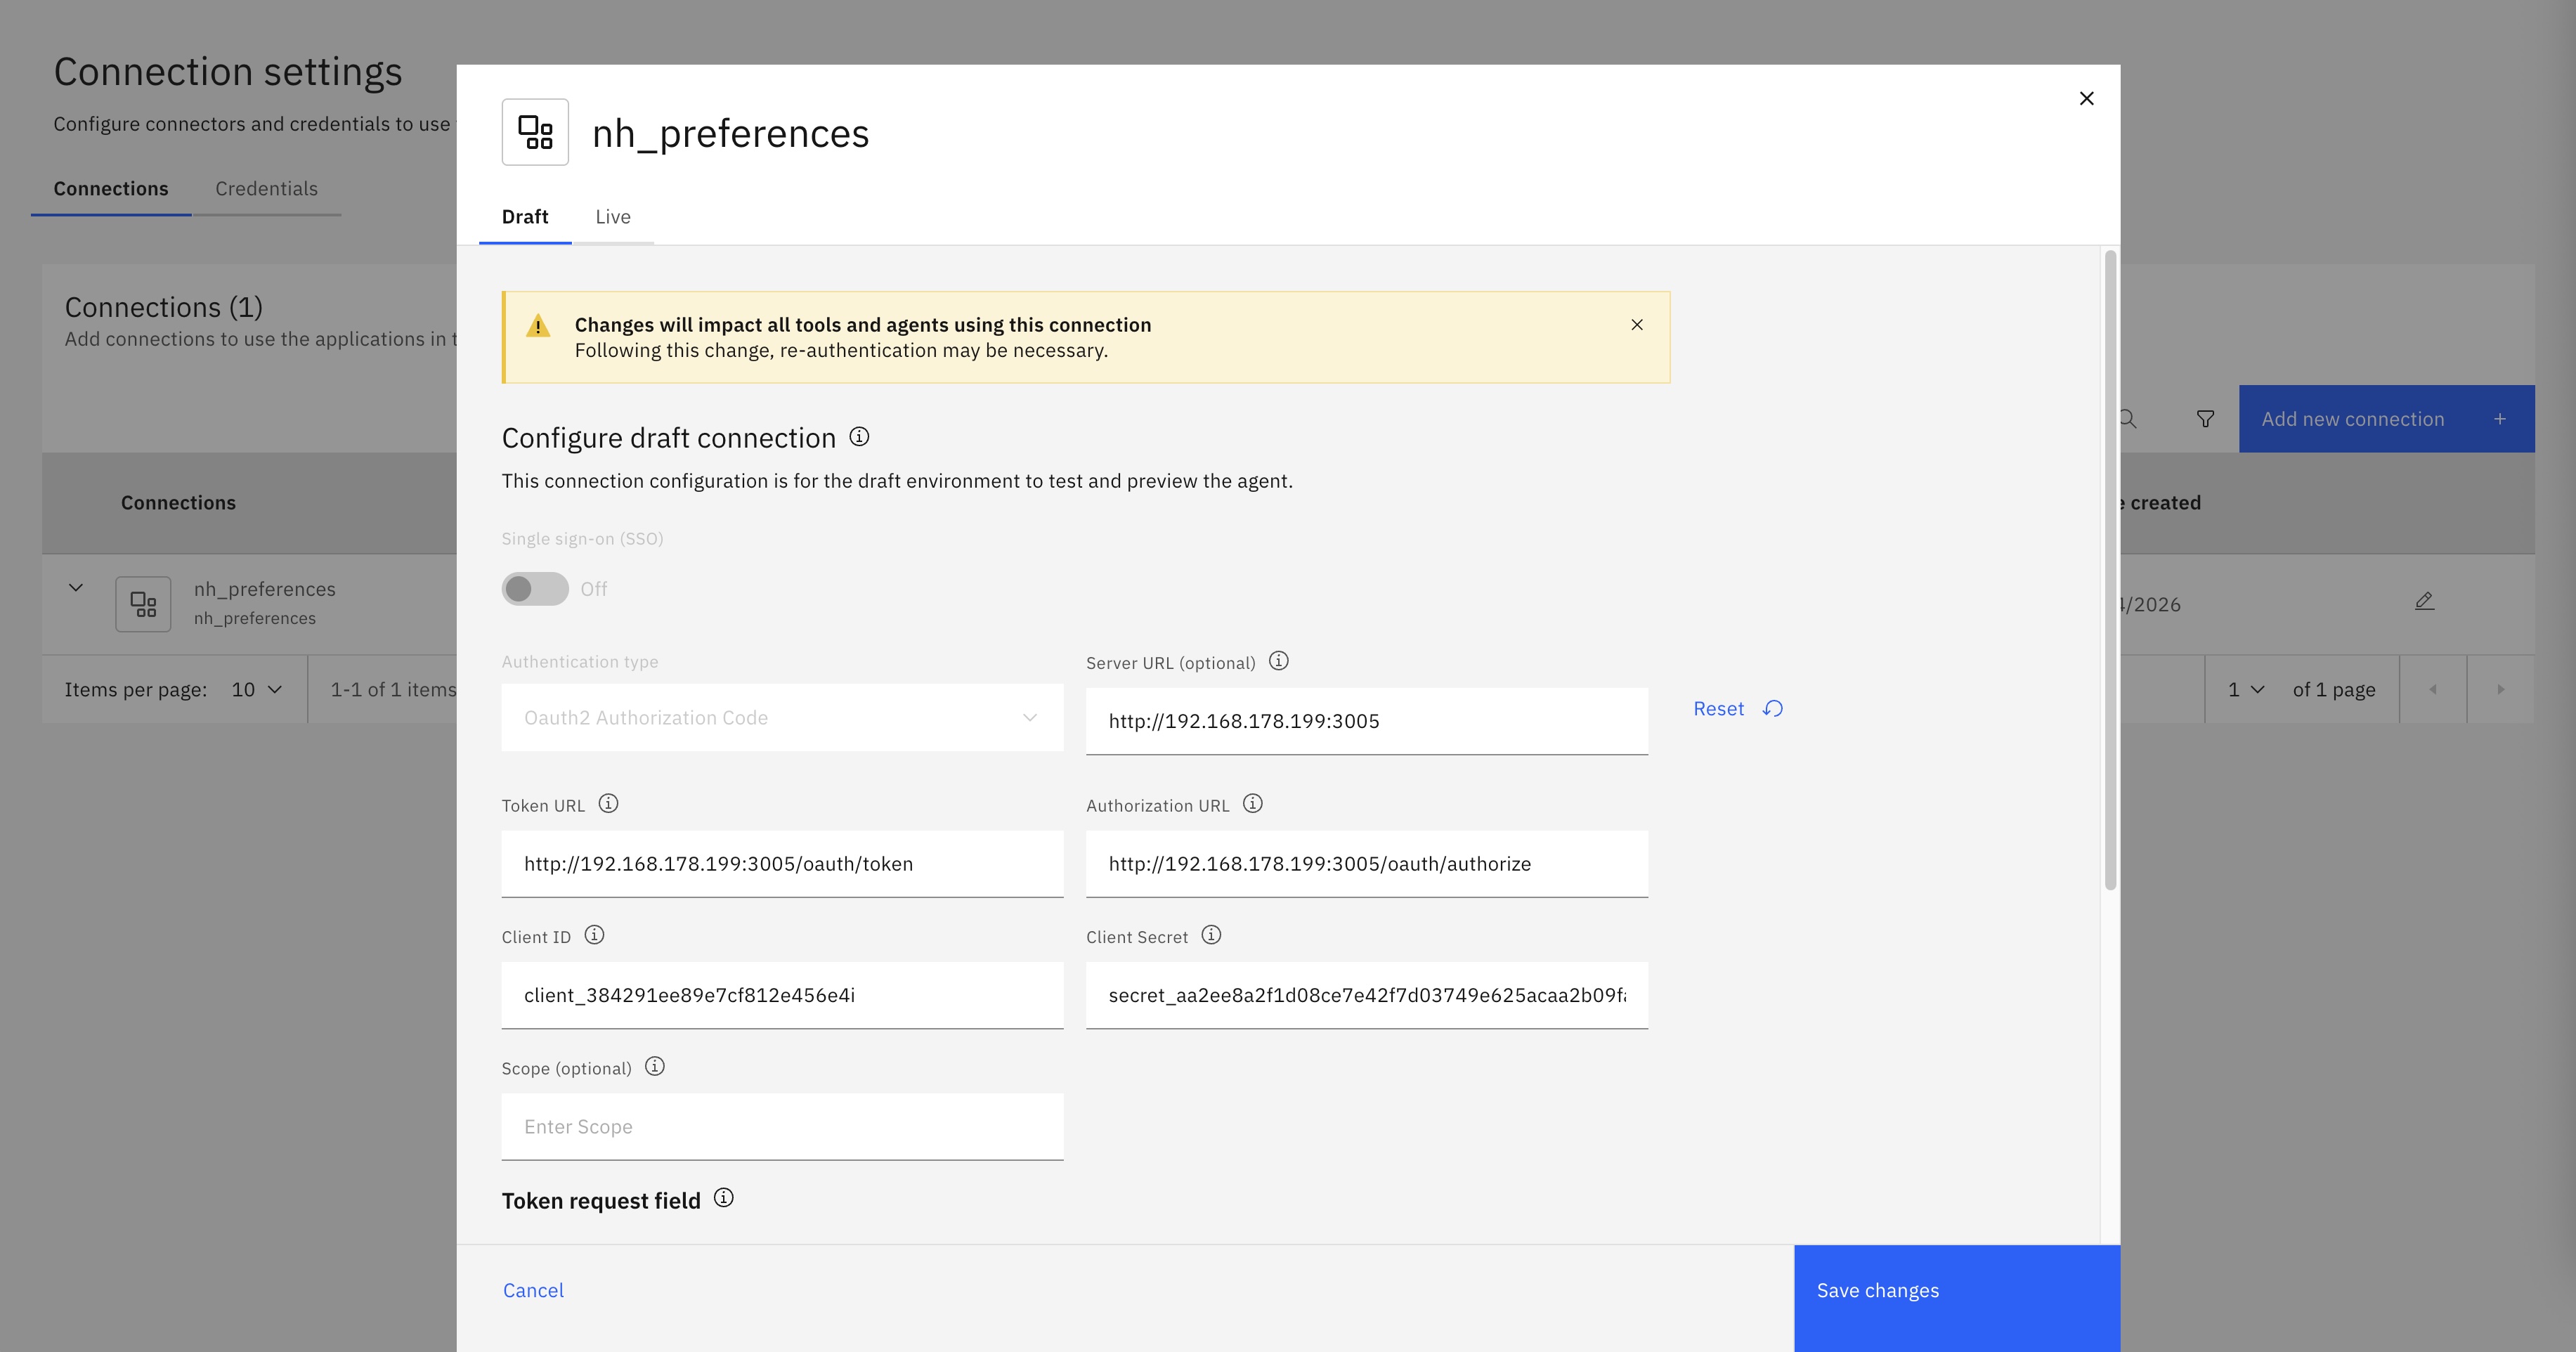
After the import, the configuration shows up in the user interface.
Tool Code
The preferences service is implemented in TypeScript. When REST endpoints are invoked, the user identities are checked by asking the OAuth server.
1
2
3
4
5
6
7
8
9
10
11
12
13
14
15
16
17
18
19
20
21
22
import { Request, Response, NextFunction } from 'express';
import axios from 'axios';
import { UserInfo, OAuthError } from '../types';

const OAUTH_USERINFO_URL = process.env.OAUTH_USERINFO_URL || 'http://localhost:3005/oauth/userinfo';

export async function requireToken(req: Request, res: Response, next: NextFunction): Promise<void> {
  const authHeader = req.headers.authorization;
  if (!authHeader || !authHeader.startsWith('Bearer ')) {
    res.status(401).json({
      error: 'invalid_token',
      error_description: 'Missing or invalid Authorization header'
    });
    return;
  }
  const token = authHeader.substring(7);
  try {
    const response = await axios.get<UserInfo>(OAUTH_USERINFO_URL, {
      headers: {
        Authorization: `Bearer ${token}`
      }
    });
The implementations of the endpoints require valid OAuth access tokens.
1
2
3
4
5
6
7
8
9
10
11
12
13
14
15
16
17
import { Router, Request, Response } from 'express';
import { requireToken } from '../middleware/tokenAuth';
import { getUserPreference, setUserPreference } from '../utils/storage';
import { PreferenceResponse } from '../types';
const router = Router();

router.get('/get_preferences', requireToken, (req: Request, res: Response) => {
  const userId = req.user!.id;
  const preference = getUserPreference(userId);

  const response: PreferenceResponse = {
    preference
  };
  res.json(response);
});

export default router;
The Orchestrate tool is implemented in Python and is a proxy to the external preferences service. The access token is read from the connections object which is available in the context.
1
2
3
4
5
6
7
8
9
10
11
12
13
14
15
16
17
18
19
20
21
22
23
24
25
26
27
28
29
30
31
32
33
34
35
36
37
38
39
40
from ibm_watsonx_orchestrate.agent_builder.tools import tool
from ibm_watsonx_orchestrate.agent_builder.connections import ConnectionType
from ibm_watsonx_orchestrate.run import connections
import requests
from typing import List, Dict, Any, Optional

MY_APP_ID = 'nh_preferences'
MY_LOCAL_IP_AND_PORT = '192.168.178.199:3006' # replace IP

@tool(
    name="get_user_preferences",
    display_name="Get User Preferences",
    description="Gets user preferences for authenticated user",
    expected_credentials=[
        {"app_id": MY_APP_ID, "type": ConnectionType.OAUTH2_AUTH_CODE}
    ]
)
def get_user_preferences() -> str:
    """
    Gets user preferences for authenticated user.

    Returns:
        User preferences as string.
    """
    creds = connections.oauth2_auth_code(MY_APP_ID)

    headers = {
        'Authorization': f"Bearer {creds.access_token}",
        'Accept': 'application/vnd.github.v3+json',
        'User-Agent': 'watsonx-orchestrate'
    }

    response = requests.get(
        'http://' + MY_LOCAL_IP_AND_PORT + '/get_preferences',
        headers=headers
    )
    response.raise_for_status()
    reponse_json = response.json()

    return reponse_json['preference']
Note that you can also have multiple connections for a tool. This is useful when using different credentials in different environments, for example.
Next Steps
To find out more, check out the following resources: