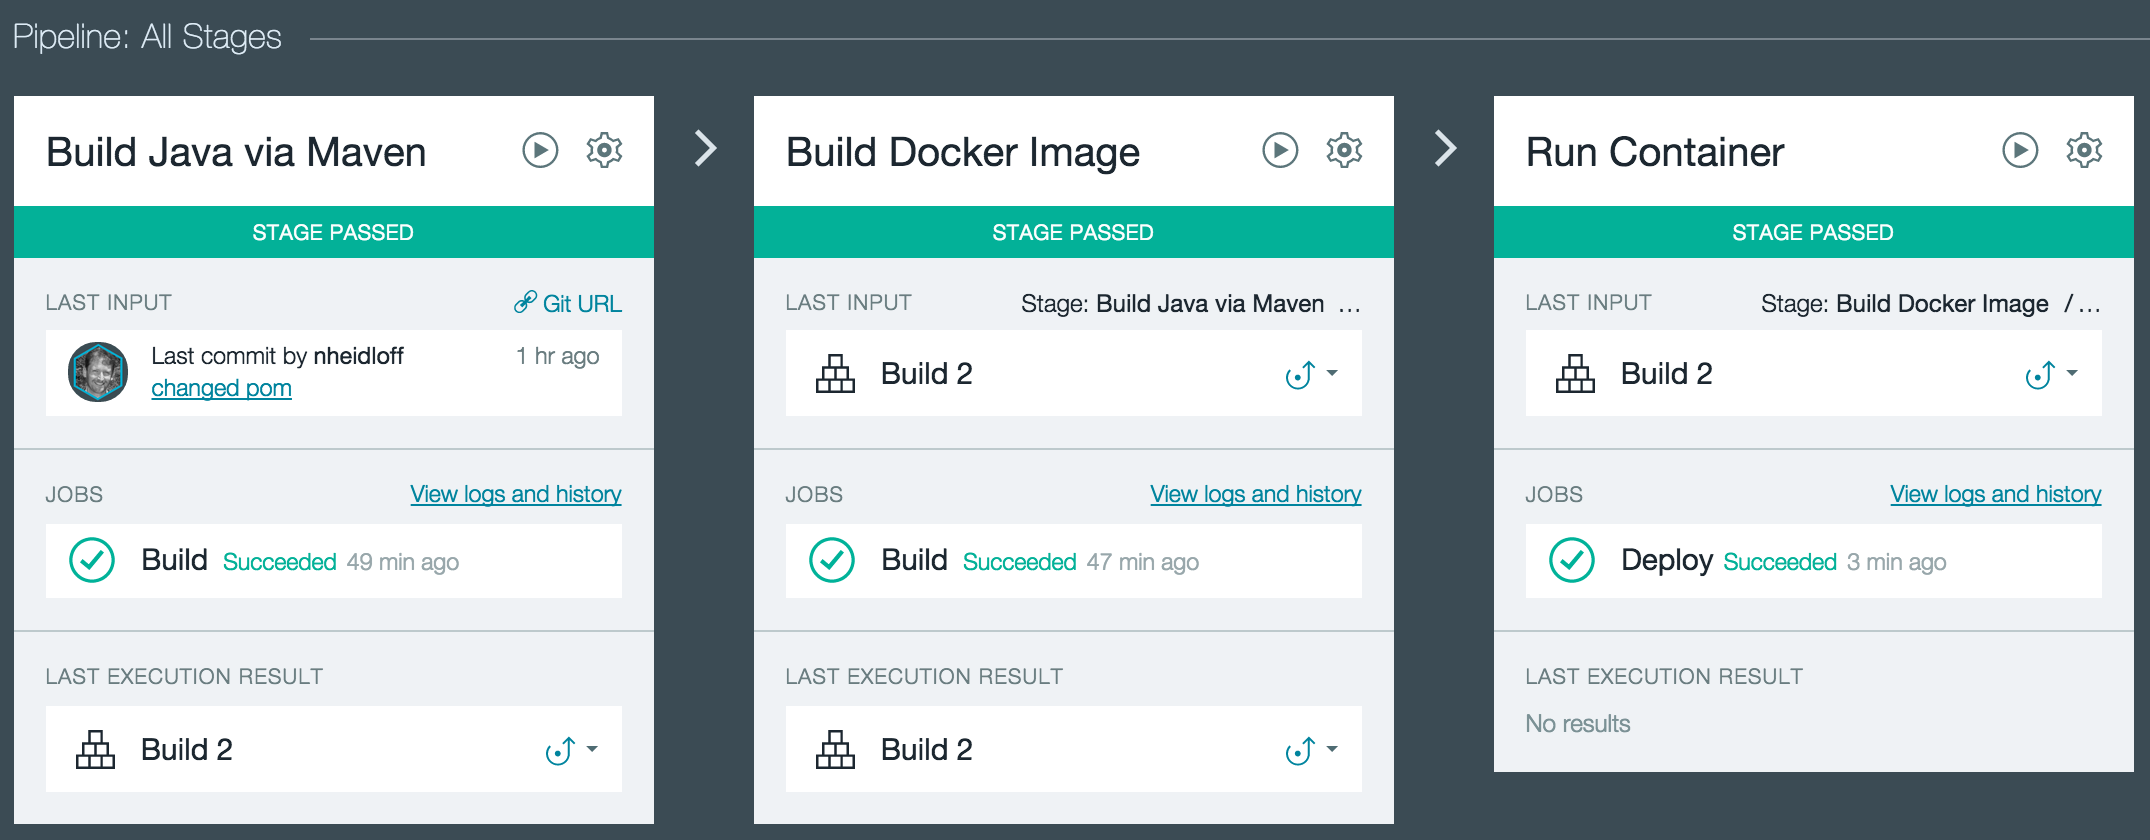
In addition to the Docker and IBM Containers CLIs (command line interfaces) you can also use IBM Bluemix DevOps pipelines to build images and run containers on the server.
DevOps pipelines have multiple stages. Usually in the first step you build your application code, for example via Maven for Java applications. This can be triggered manually or automatically when pushing code to the source control system (Git in DevOps or GitHub). In a second stage the Docker image can then be built and pushed in the user’s access controlled image registry in Bluemix. In yet another stage the application can then be deployed, or in other words containers can be run. You can also leverage other functionality in pipelines, for example globalization or static code security analysis. Read the article DevOps for containers and the documentation How to: Set up continuous delivery for IBM Containers for more details.
Below is a quick sample for how to deploy an as easy as possible Java (Liberty) application. In the first stage the application is built, in the second stage the image is created and in the third stage the container is run.
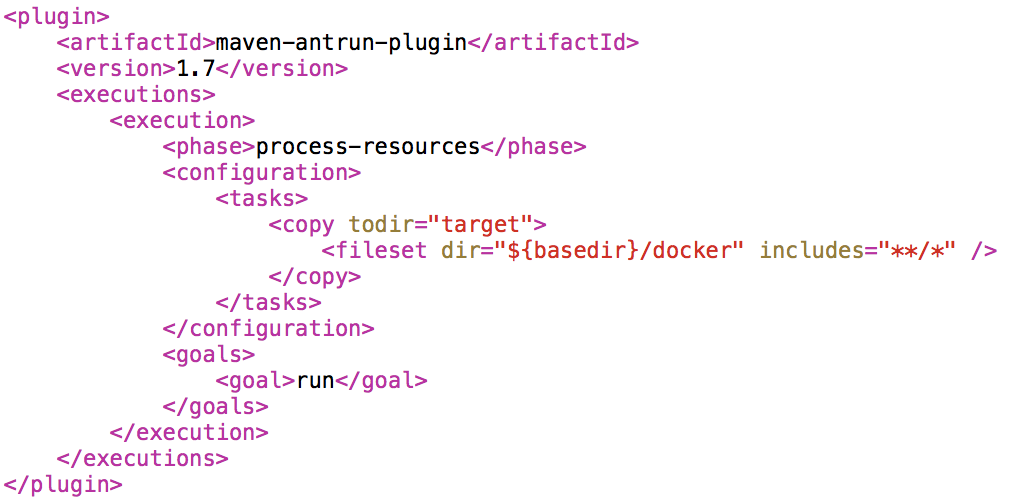
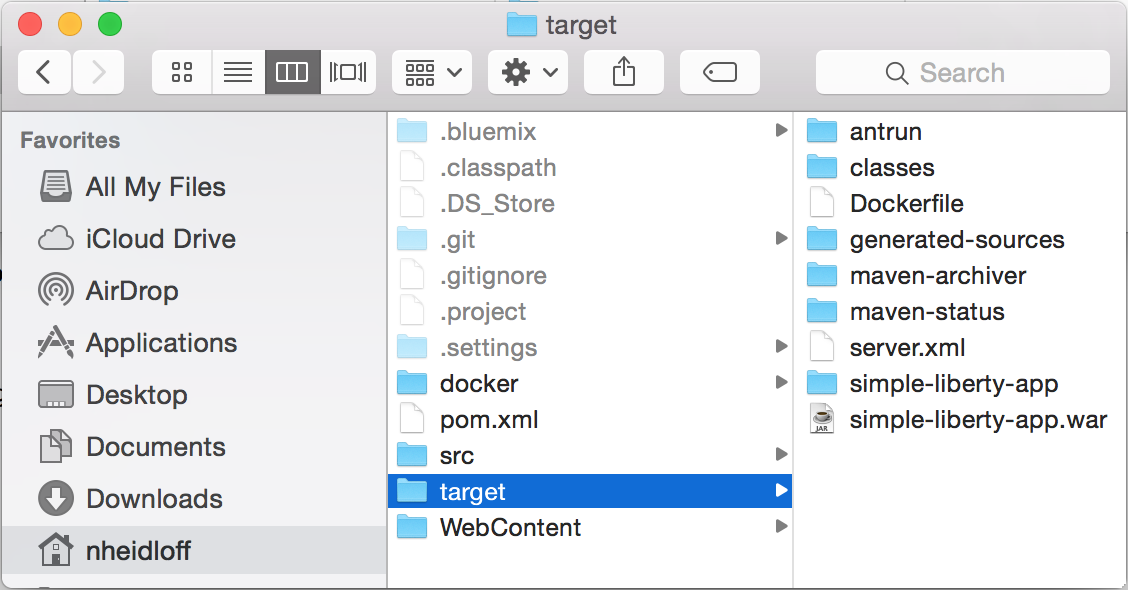
Using this functionality is pretty straight forward. There was only one little thing that I had to change in my project. I had my Dockerfile in the root directory. Maven created the war file and put it in a target directory which is the base for the second stage. The Docker image could not be created since the Dockerfile was not in that same working directory in the second stage. So I added some code to pom.xml to copy the Dockerfile into the directory “target”. After this I could use all defaults in the DevOps UI when creating the stages. I only had to define the names for the image and the container.
As result of the Maven build the Dockerfile (and server.xml) was copied in the target directory with the war.
The Dockerfile is very simple and refers to server.xml and the war in the same directory.
In the server.xml I defined to use the ports 80 and 443.


