
Open Liberty is a flexible Java application server. It comes with Eclipse MicroProfile which is a set of tools and APIs to build microservices. With these technologies I have created a simple hello world microservice which can be used as template for your own microservices. In this article I describe how to deploy it to OpenShift.
The sample microservice is available as open source.
Microservice Implementation
The microservice contains the following functionality:
- Image with OpenJ9, OpenJDK, Open Liberty and MicroProfile: Dockerfile
- Maven project: pom.xml
- Open Liberty server configuration: server.xml
- Health endpoint: HealthEndpoint.java
- Kubernetes yaml files: deployment.yaml and service.yaml
- Sample REST GET endpoint: AuthorsApplication.java, GetAuthor.java and Author.java
If you want to use this code for your own microservice, remove the three Java files for the REST GET endpoint and rename the service in the pom.xml file and the yaml files.
Deployment Options
The microservice can be run in different environments:
- Docker
- Minikube
- IBM Cloud Kubernetes Service
- Minishift
- Red Hat OpenShift on the IBM Cloud
Deployment to Red Hat OpenShift on the IBM Cloud
The following instructions should work for OpenShift, no matter where you run it. However I’ve only tested it on the IBM Cloud.
IBM provides a managed Red Hat OpenShift offering on the IBM Cloud (beta). You can get a free IBM Cloud Lite account.
After you’ve created a new cluster, open the OpenShift console. From the dropdown menu in the upper right of the page, click ‘Copy Login Command’. Paste the copied command in your local terminal, for example ‘oc login https://c1-e.us-east.containers.cloud.ibm.com:23967 –token=xxxxxx’.
Get the code:
1
2
3
$ git clone https://github.com/nheidloff/cloud-native-starter.git
$ cd cloud-native-starter
$ ROOT_FOLDER=$(pwd)
Push the code and build the image:
1
2
3
4
5
6
$ cd ${ROOT_FOLDER}/authors-java-jee
$ oc login ...
$ oc new-project cloud-native-starter
$ oc new-build --name authors --binary --strategy docker
$ oc start-build authors --from-dir=.
$ oc get istag
Wait until the image has been built. Then deploy the microservice:
1
2
3
4
5
6
7
8
9
$ cd ${ROOT_FOLDER}/authors-java-jee/deployment
$ sed "s+<namespace>+cloud-native-starter+g" deployment-template.yaml > deployment-template.yaml.1
$ sed "s+<ip:port>+docker-registry.default.svc:5000+g" deployment-template.yaml.1 > deployment-template.yaml.2
$ sed "s+<tag>+latest+g" deployment-template.yaml.2 > deployment-os.yaml
$ oc apply -f deployment-os.yaml
$ oc apply -f service.yaml
$ oc expose svc/authors
$ open http://$(oc get route authors -o jsonpath={.spec.host})/openapi/ui/
$ curl -X GET "http://$(oc get route authors -o jsonpath={.spec.host})/api/v1/getauthor?name=Niklas%20Heidloff" -H "accept: application/json"
Rather than using ‘oc apply’ (which is essentially ‘kubectl apply’), you can also use ‘oc new-app’. In this case you don’t have to create yaml files which makes it easier. At the same time you loose some flexibility and capabilities that kubectl with yaml files provides.
1
$ oc new-app authors
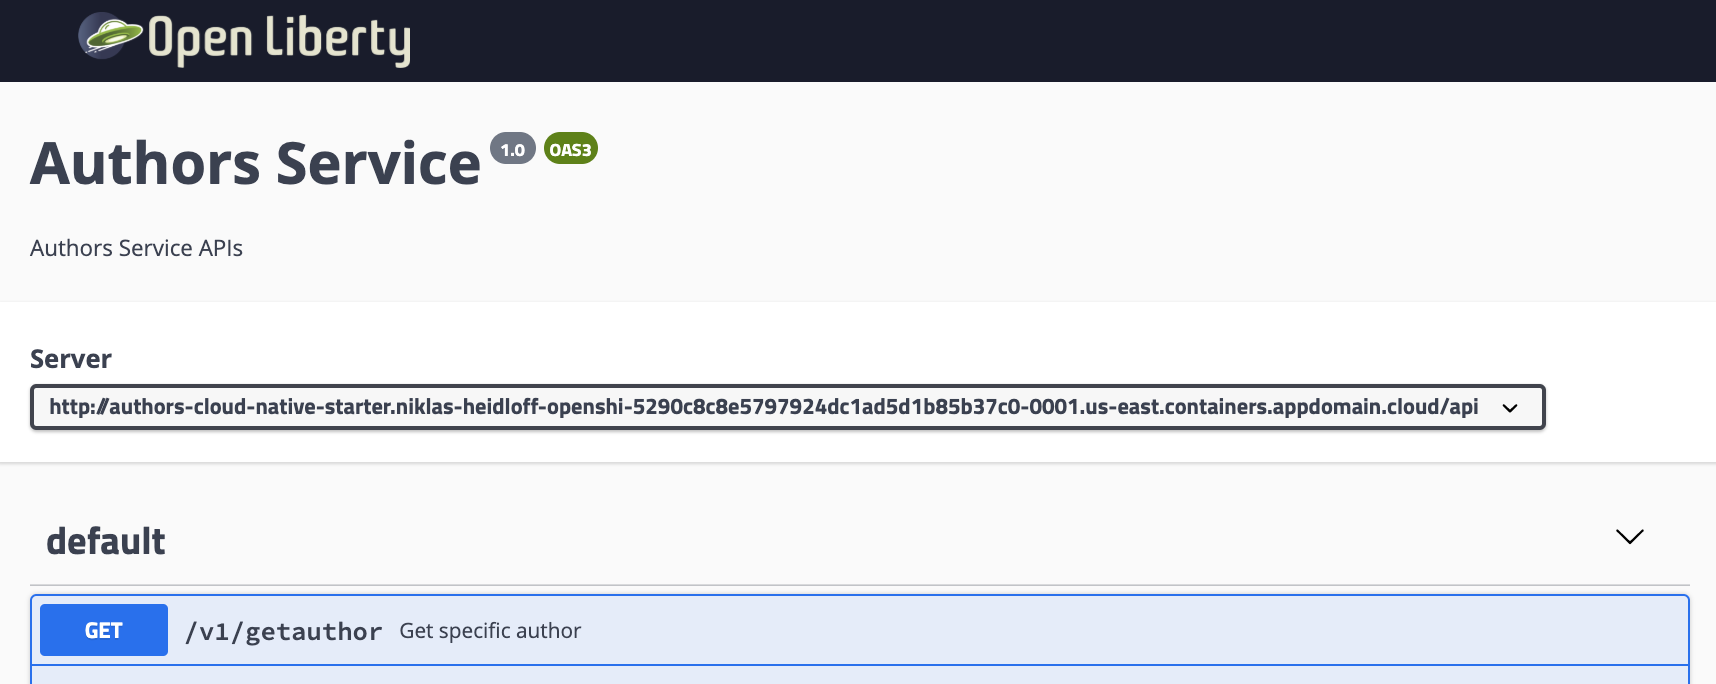
After this you’ll be able to open the API explorer and invoke the endpoint:
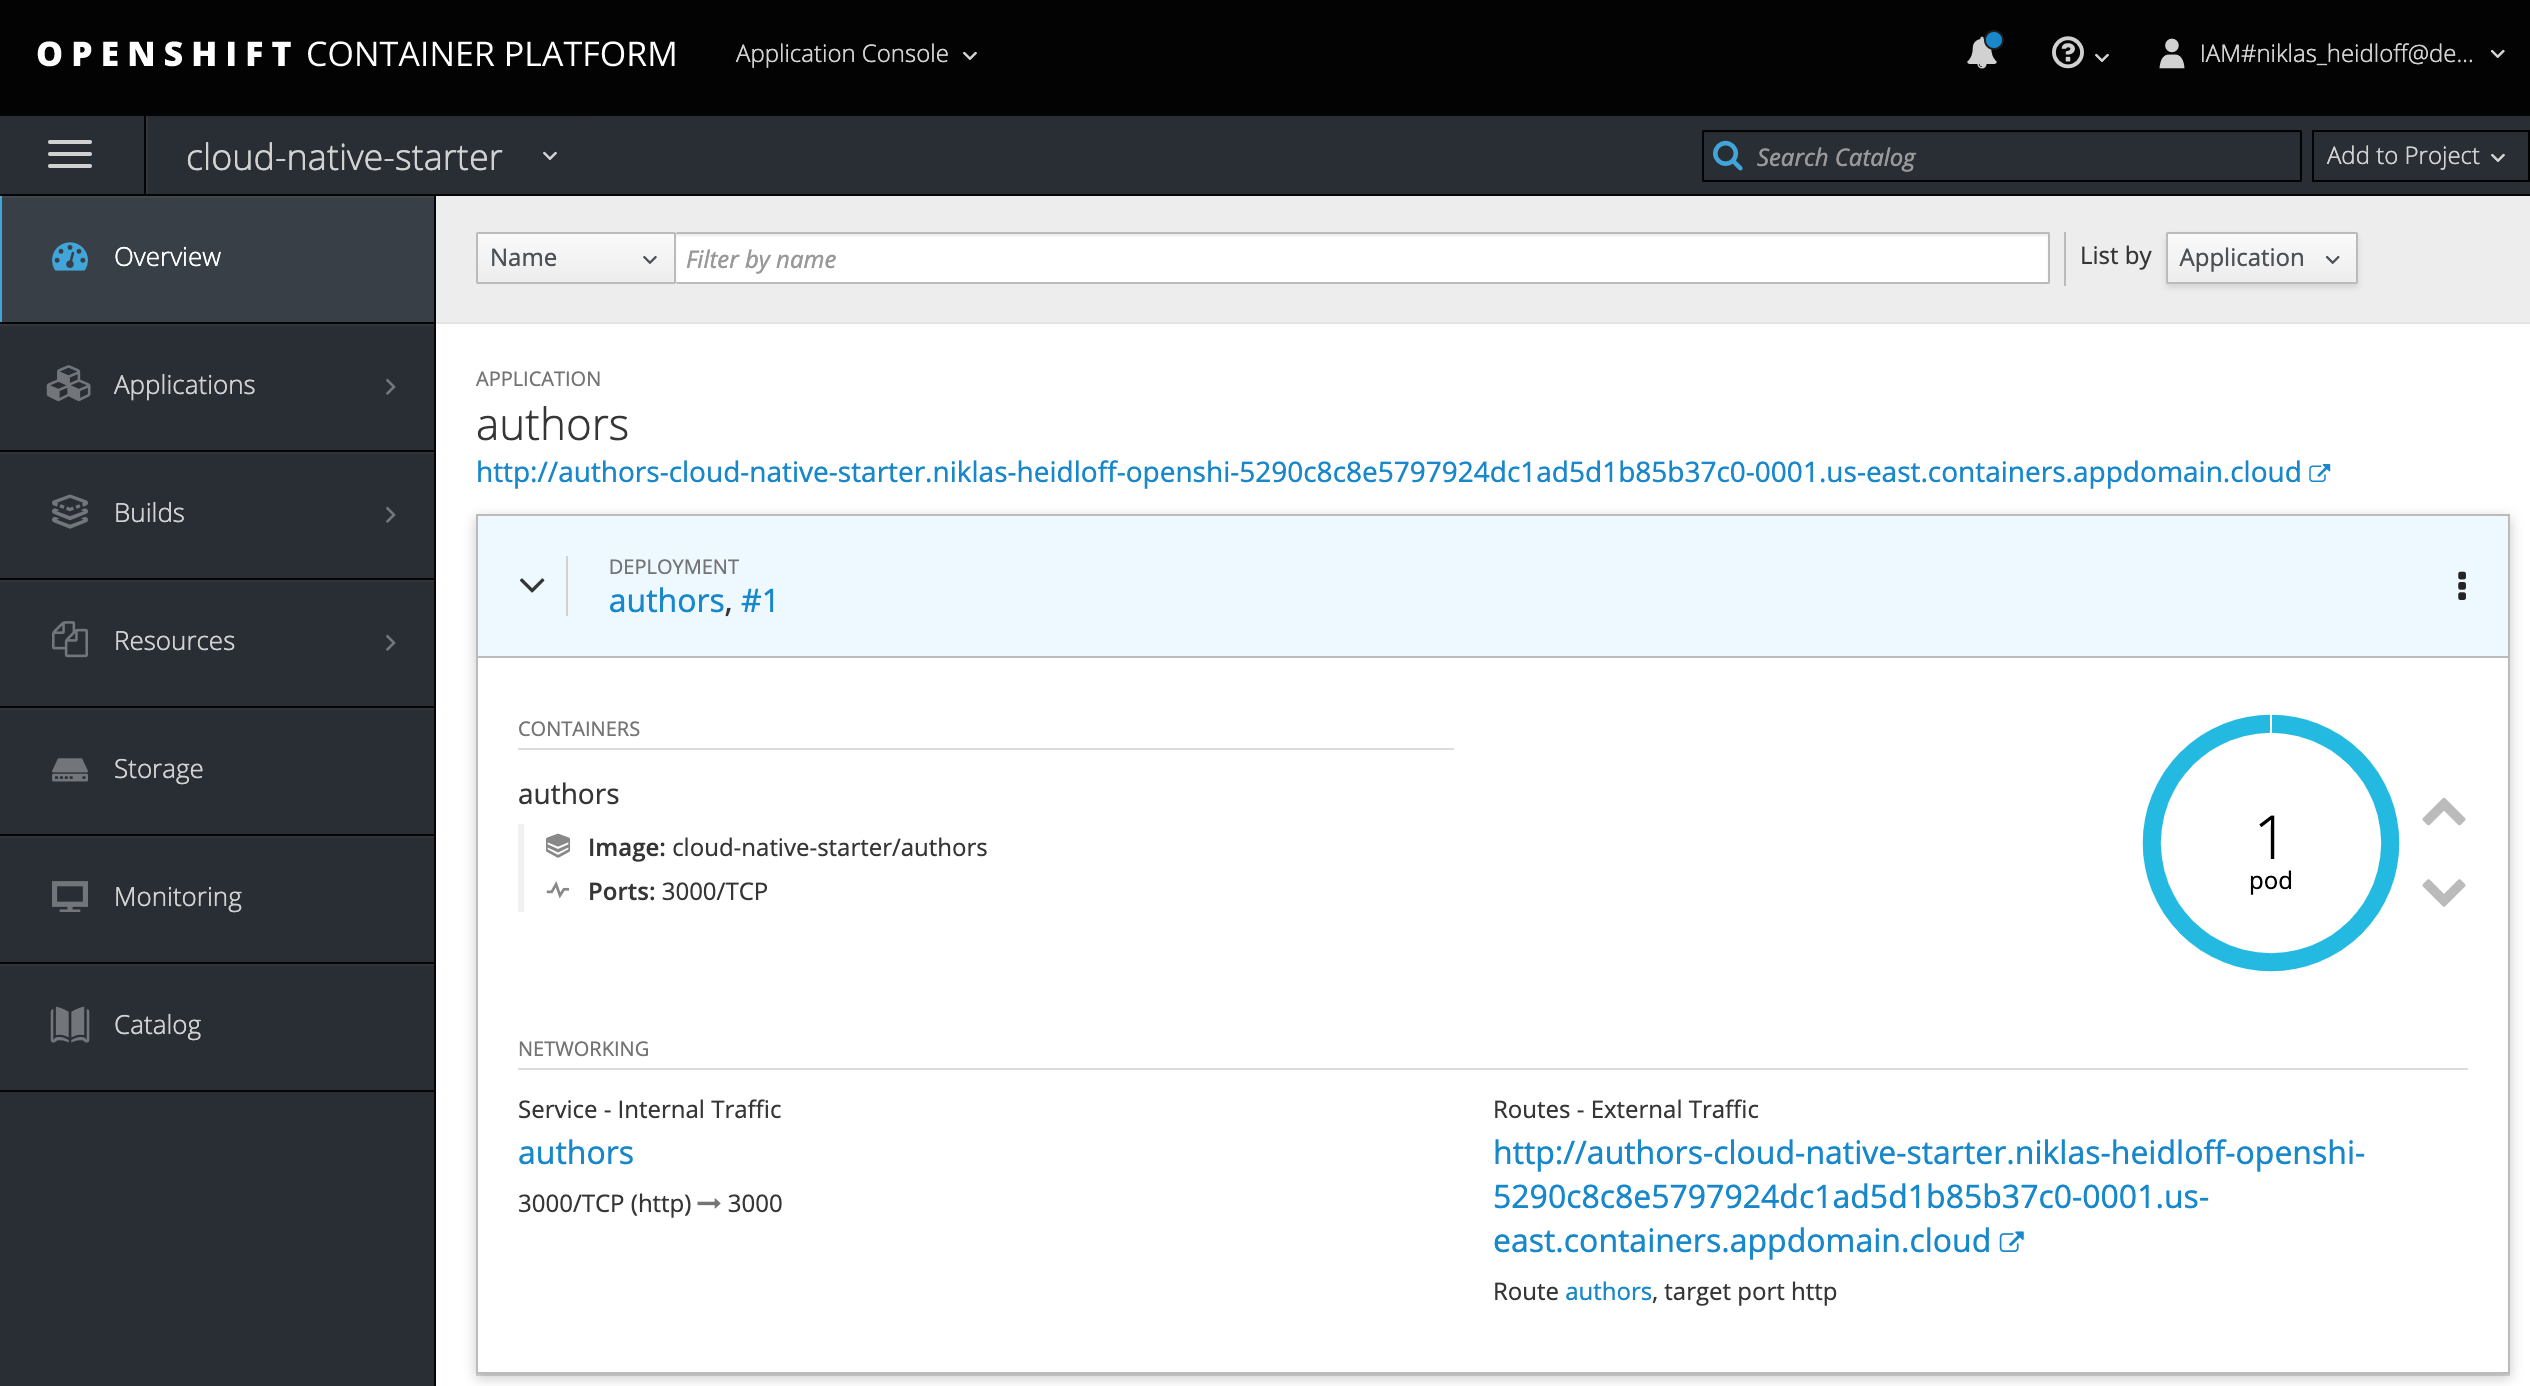
After the deployment the application will show up in the OpenShift Web Console:
Note that there are several other options to deploy applications to OpenShift/OKD. Check out my previous article Deploying Open Liberty Microservices to OpenShift.
This sample is part of the GitHub repo cloud-native-starter. Check it out to learn how to develop cloud-native applications with Java EE/Jakarta EE, Eclipse MicroProfile, Kubernetes and Istio and how to deploy these applications to Kubernetes, Minikube, OpenShift and Minishift.